 |
 |
|
|
PRINT SOLUTIONS OVERVIEW
PHOTO BOOKS
Upload and Print How-tos
Design Specs & Templates
CARD LAYOUTS
Upload and Print How-tos
Design Specs & Templates
PHOTO GIFTS
Upload and Print How-tos
Design Specs & Templates
SCRAPBOOK PAGES
• Upload and Print How-tos
Design Specs & Templates
COMMUNITY
PRINT PAGES NOW
FAQ
|
 |
|
Upload and Print How-tos |
 |
|
1. Create an account/sign in |
|
|
1. Visit www.shutterfly.com and set up a free Shutterfly account or
2. Login to your Shutterfly account
Shutterfly Recommends:
• Shutterfly NEVER deletes any images or your projects
|
|
2. Add/upload images into your account |
|
|
1. Select “Add pictures” tab and follow instructions
to upload images from computer into online album

|
Shutterfly Recommends:
• First consult the Print Your Digital Scrapbook Pages guide
for exact sizing of pages.
• Templates are available for download as guides
• Images should be in .jpg format
• Recommended image size is 300dpi/RGB color mode
(note: turn off VividPics®)
|
Back to Top |
|
3. Turn off VividPics® |
|
|
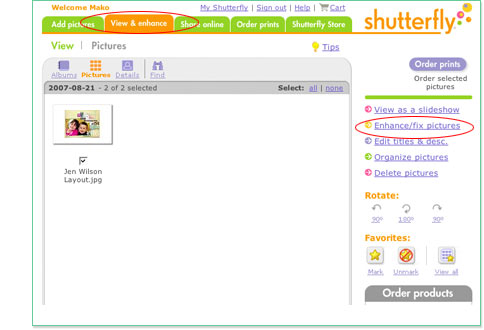
1. Click on the View & enhance tab at the top of the screen
2. Click on the Enhance/fix pictures link to the right |
|
|
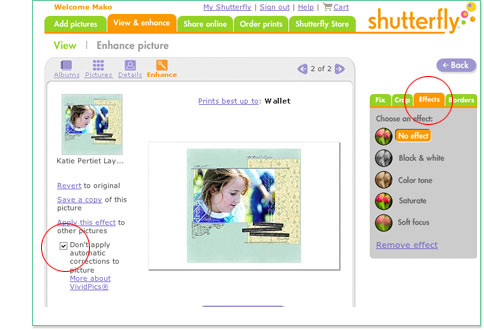
3. Click on the Effects tab to the right of the screen
4. Check the “Don’t apply automatic corrections to picture” box
|
Back to Top |
|
4. Turn off Easy Crop |
|
|
1. Click on the View & enhance tab at the top of the screen
2. Click on the Enhance/fix pictures link to the right 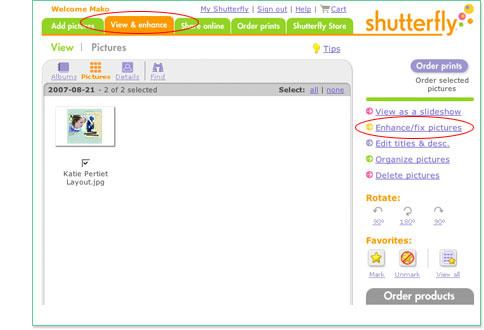
3. Click on the Crop tab to the right of the screen
4. Click on the Custom crop tool link to the bottom right 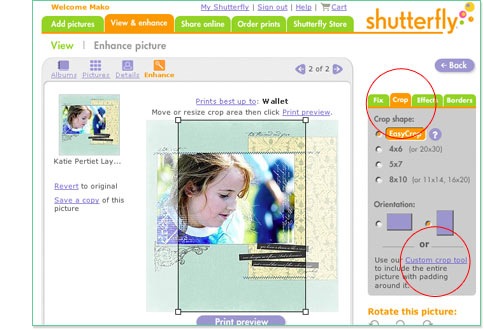
|
Back to Top |
5. Select Layout Size/Select Full Bleed from Any Occasion |
|
|
1. Select Digital Scrapbookers from Shutterfly Store 
2.
A. Select scrapbook page desired 
OR
2.
B. Choose your page size from www.shutterfly.com/digitalscrapbooking scrapbook pages intro
3. Select ANY occasion in Scrapbooking Page Size and click “Get started”
4. Select Full Bleed Layout from layout tab 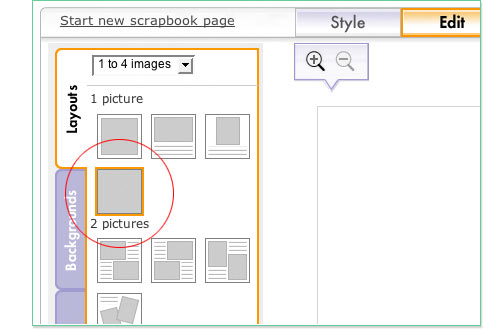
|
Back to Top |
6. Get Images |
|
|
1. Select “Get pictures”
2. Select desired .jpg image from your Shutterfly album
3. Select “Add selected pictures” (images will appear in
filmstrip thumbnail below layout) |
Shutterfly Recommends:
• It is critical to upload images using the specs
provided to attain optimal results
• Images may appear cropped in the filmstrip
thumbnails; this is NOT representative of the
final product. Use preview mode to get an accurate
rendering of the final printed product |
Back to Top |
7. Drag and Drop Image into page |
|
|
1. Confirm you are in the edit “Pages” mode from the tabs on top
2. Drag and drop image from the filmstrip 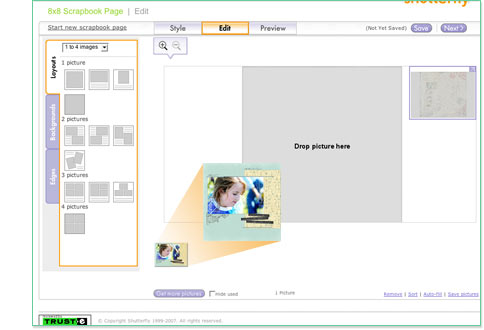
|
Back to Top |
8. Preview |
|
|
1. Click “Preview” from the tabs on top to review your layout |
Shutterfly Recommends:
• Changes (adjustments in positioning etc.) should be
made to the original image, re-uploaded into album,
and then into your project provided to attain optimal
results
• Remember to preview again |
Back to Top |
9. Order |
|
|
1. Click “Next” to order your completed Digital Scrapbook Page |
Back to Top |
|
|