Everyone has clutter in their homes, whether we want to admit it or not. Maybe it’s your closet, filled with clothes that you haven’t touched in years. Perhaps the kids’ room needs major organizing. Whatever the case, it is never too late for spring cleaning!


Clutter can cause stress, and keeping items around your home that you don’t necessarily need can be toxic for your health. Find out how to declutter your home in just thirty days with our simple step by step guide.
Living Room
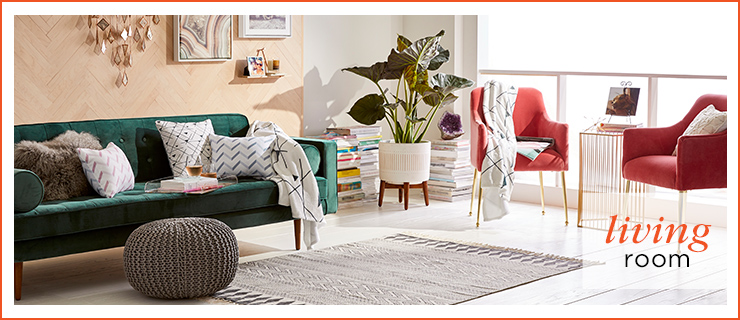
Your living room is the first place that guests walk into when entering the house. If there is an excess amount of items, such as too many papers on the coffee table, or an overflow of books on the bookshelf, it can seem unorganized and messy. Help your living room look put together and sophisticated by following the first five days of our declutter guide.
Day 1: Organize the coffee table
Today is the first day of the thirty-day challenge! Start by tackling the coffee table. Evaluate what is absolutely necessary to have. Anything that you haven’t read or used in the past three months? Store it away or ditch it.
Day 2: Declutter your entertainment center
If you have piles of DVDs (yes people still use these) determine what movies are not worth taking up space. You can also do this for video games and dated electronic devices. Once sorted, take the donations to a local Goodwill store or an electronic recycling center.
Day 3: Organize your bookshelf
Spend an hour and go through what has been read, favorite books and ones that could be given away. Take to a local bookstore or donate to an organization in need of books for children, like Books for Africa.
Day 4: Assign organizing bins
Buy or use baskets from home that match the theme of your living room and attach name tags for each family member. That way, everyone gets to decide what they want to store and keep within reach.
Day 5: Pick up unused accessories
For finishing touches on decluttering your living room space, pick up excess bags and jackets not in use and hang in the mud room. If the items have not been used for more than a month, store away or donate.
Bedroom

The next five days are dedicated to possibly the most important room in the house, the bedroom. This is your sanctuary, where you come to relax after a long day of work or spend a lazy Saturday. Removing piles of clothing and cleaning out closets can be a huge stress relief and the perfect way to start getting organized.
Day 6: Declutter the wardrobe
Create three piles: keep, donate and toss. Then begin, and be honest with yourself—have you worn this in the past year? Does this item still fit and/or is it damaged in any significant way? Or, ask yourself the question that Marie Kondo made famous—does this article bring me joy? If the answer is no, toss it or put in the pile for donations.
Day 7: Clear office desk
Go through what you use on a daily basis for work, and what can be tossed or stored elsewhere. Do this for bedside tables as well, removing unnecessary items from drawers and table tops.
Day 8: Install hooks on the back of the door
This creates instant storage without taking up surface area. Hang items that usually are thrown onto the bed or chair to create a pile-free room.
Day 9: Install Corner Shelves
These are ideal for holding picture frames, candles and small plants. This project is easy to do and convenient for freeing up surface space in the bedroom.
Day 10: Add in storage pieces as needed
Once you have decided what is necessary to keep, place items in boxes or baskets and label by the item name. Storage containers can be tucked under the bed or in closet shelf space.
Kids’ Room

The kids’ room can be overwhelming, and a major clutter zone. There are toys everywhere, and a ton of misplaced items from other areas in the home that need to be returned. Tackle this one with the kids, they’ll appreciate it and you’ll love the organization skills they’ll take away!
Day 11: Go through the kids’ toys with them
For each toy, ask if that toy belongs there or if it should be donated. If the child is hesitant, remind them it will be going to a loving new home.
Day 12: Divide room into sections
Perhaps put all the dolls in one corner, and the craft section on the other side. This makes it easy for clean up and helps the little ones stay organized.
Day 13: Purchase storage boxes
For toys and games that are not in use, place in storage boxes. Pro tip: Color coordinate for each child for easy identification.
Day 14: Install an indoor mailbox
If your children are in school, then you know the amount of paper and artwork that they’ll be bringing home on a weekly basis. Simplify the paper piles by installing a mailbox for each child.
Day 15: Create a declutter chart
Set up the chart on the wall and use stickers to keep track. Every time they organize their toys, donate an old doll or clean up after playtime, they earn an extra 15 minutes of screen time.
Bathroom

You’re halfway through! Before you celebrate, it’s time to declutter your bathroom. Let’s face it—you haven’t used those products in your cabinet in months, and the excess “stuff” is making you crazy. Check out the next five days for decluttering and organizing your bathroom.
Day 16: Pull all items out of the bathroom
Then go through and determine what you use on a daily basis, weekly, monthly or rarely. Toss out products you seldom use and keep monthly items in a spare closet or below the sink.
Day 17: Check medicine expiration dates
While lipstick might last past expiration, medication could potentially be dangerous once expired. Toss expired meds and talk to your family to ensure that proper medications are refilled.
Day 18: Place divided drawer organizers in cabinets
For items that are used frequently, you’ll want quick access while still keeping the bathroom tidy. Drawer organizers create instant storage for necessary products in one central location.
Day 19: Install Wall-Mounted holders
Declutter the bathtub and sink space by installing wall-mounted holders. Select soap dispensers and toothbrush holders that can attach to the wall to free up counter space.
Day 20: Wash or discard rugs and towels
Wash on high heat or if it’s been a few years since you last replaced these, it may be time to purchase new ones. Another indicator? If they are reasonably faded of color, go ahead and toss them.
Entryway

The entryway is the first impression for any home. It also gets cluttered quickly as jackets get piled up and keys are stacked on hooks. For the next five days, clear the entryway and organize miscellaneous items for a happier you and a simplified entrance.
Day 21: Clear floor of shoes
Remove any shoes that have not been worn in the past three days and place in respective rooms/closets. Place frequently worn shoes in cubbies or storage boxes for quick access.
Day 22: Remove unnecessary items
That decorative chair that no one sits in? The umbrella bucket in the heart of July? Go ahead and remove items that do not belong, or are off season and store away or ditch them.
Day 23: Shake out mats
Take any mats used in the entryway outside and shake out dirt and dust. For additional cleaning, vacuum mats before returning inside.
Day 24: Hang a key rack near the door
Your cute key dish looks great, but in reality, it takes you forever to find your keys in the morning. Install a key rack for quick grab and go.
Day 25: Add decorative storage for assorted items
Place receipts and coupons in a small basket and DIY a mason jar piggy bank for the perfect change collector.
Kitchen

Whether it is the overflow of pots and pans or a crammed refrigerator, your kitchen needs a serious upgrade. With these last five days, take a few minutes out of your day to organize and declutter the final room in your home.
Day 26: Reduce pots and pans
Take all pots and pans out of the cabinets and determine what is used on a regular basis. Sell rarely used items as well as any duplicate appliances in a garage sale, or discard if damaged.
Day 27: Tackle the “junk” drawer
We all have a drawer with odds and ends that have no other place in the home. While it’s okay to have a junk drawer, review the contents and toss any old phone cords, batteries and old paperwork to optimize space.
Day 28: Clean out the fridge
Take all of the food out of the fridge and check expiration dates. If leftovers have been in the fridge for more than a week, throw them out. Most condiments once opened should be tossed after six months.
Day 29: Determine Tupperware mates
This task is a bit taxing, but a huge storage saver. Make it a game for the whole family to find the matching pairs of tupperware–winner gets their ice cream of choice!
Day 30: Eliminate excess decorations
Keep the standing plant, but think about storing the large cookie jar that seldom gets opened or the Christmas decorations after New Years. Magnets and A+ artwork are a great way to keep decor while decluttering.
After 30 days, you are now an expert in organizing each room in the home. Whether it’s tackling the living room mess, or removing unnecessary items from your kitchen or bathroom, it can lift weight off your shoulders to declutter your home. Download the printable below so you can keep these tips as a monthly reminder to keep your home nice and organized.

Getting rid of unnecessary items or decor can make all the difference in the overall ambiance of your home. Share our full guide below, to create a decluttered, stress-free home. And check out our home decor accents for stylish storage ideas!