


Design Holiday Cards
Send holiday greetings with custom Christmas & holiday cards

Fall Quotes to Celebrate the Season
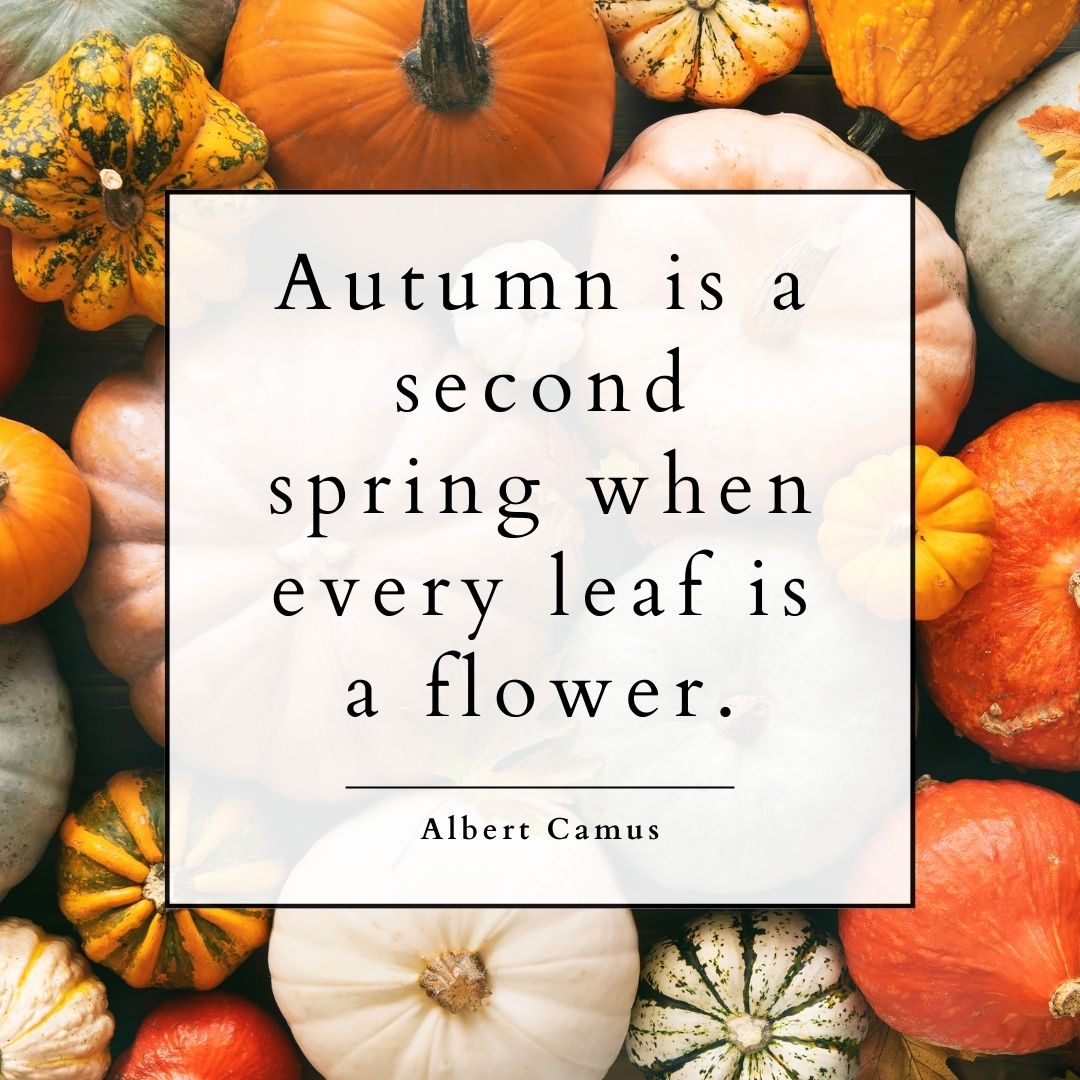
- “Autumn is a second spring when every leaf is a flower.” — Albert Camus
- “I’m so glad I live in a world where there are Octobers.” — L.M. Montgomery
- “Autumn shows us how beautiful it is to let things go.” — Unknown
- “The heart of autumn must have broken here, and poured its treasure upon the leaves.” — Charlotte Bates
- “Autumn leaves don’t fall, they fly. They take their time and wander on this their only chance to soar.” — Delia Owens
- “Every leaf speaks bliss to me, fluttering from the autumn tree.” — Emily Brontë
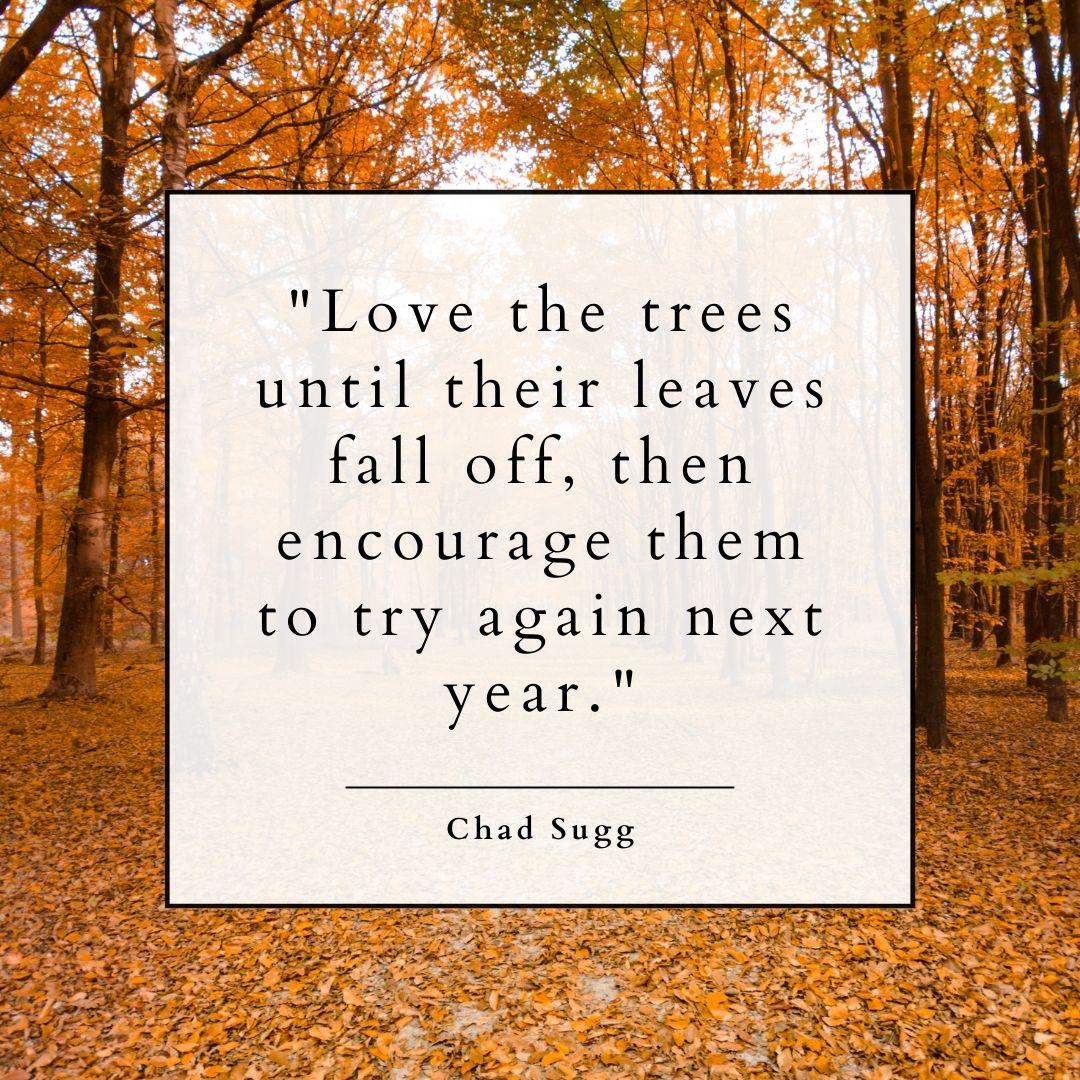
- “Life starts all over again when it gets crisp in the fall.” — F. Scott Fitzgerald
- “Autumn burned brightly, a running flame through the mountains, a torch flung to the trees.” — Faith Baldwin
- “The beauty of autumn is that it reminds us that even the most beautiful things have to end, and it’s okay.”
- “I hope I can be the autumn leaf, who looked at the sky and lived. And when it was time to leave, gracefully it knew life was a gift.” — Dodinsky
- “A wind has blown the rain away and blown the sky away and all the leaves away, and the trees stand. I think, I too, have known autumn too long.” — E. E. Cummings
- “Autumn is the hardest season. The leaves are all falling, and they’re falling like they’re falling in love with the ground.” — Andrea Gibson

- “Autumn carries more gold in its pocket than all the other seasons.” — Jim Bishop
- “Autumn is as joyful and sweet as an untimely end.” — Remy de Gourmant
- “Anyone who thinks fallen leaves are dead has never watched them dancing on a windy day.” — Shira Tamir
- “Autumn is the mellower season, and what we lose in flowers we more than gain in fruits.” — Samuel Butler
- “Autumn, the year’s last, loveliest smile.” — William Cullen Bryant
- “If a year was tucked inside of a clock, then autumn would be the magic hour.” — Victoria Erickson
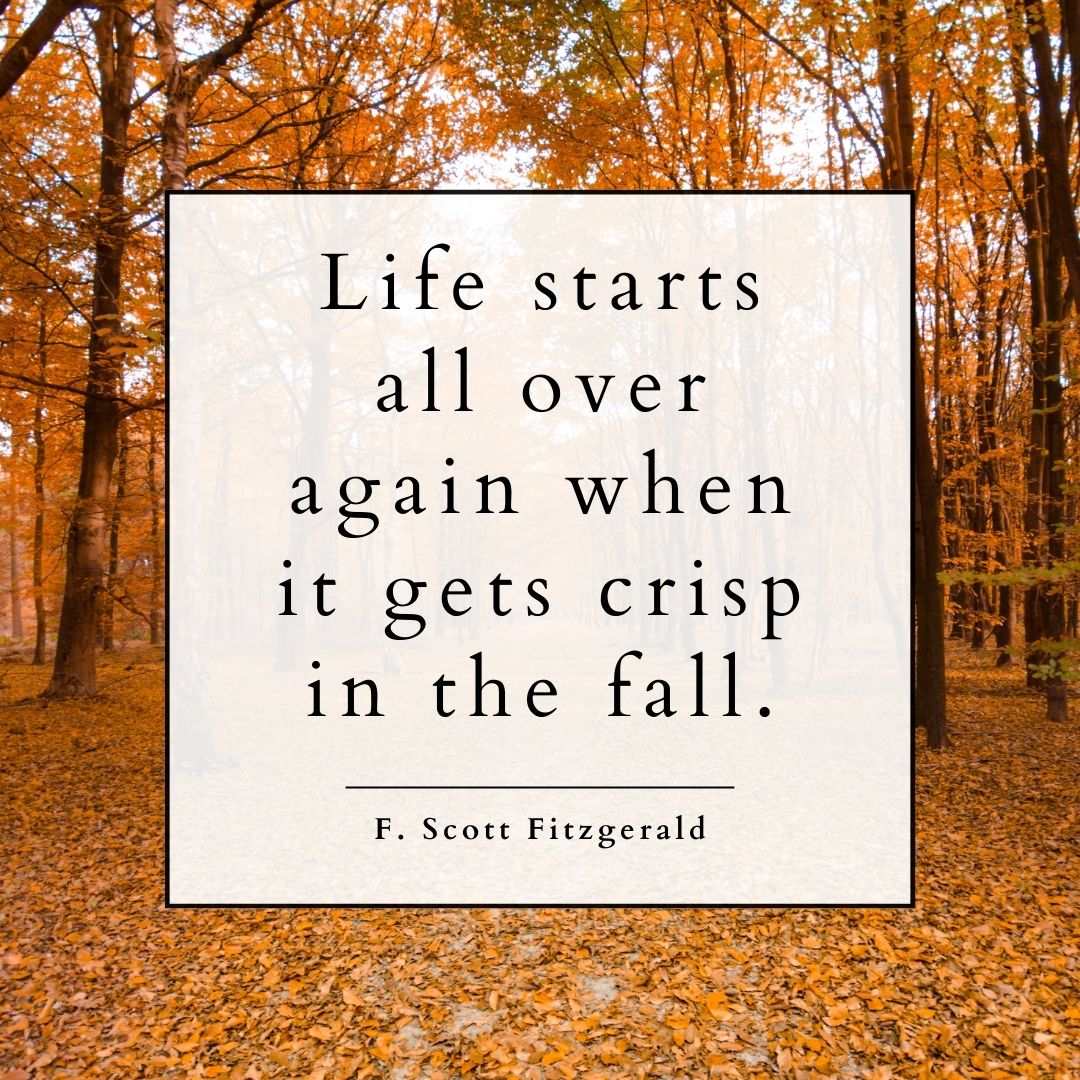
- “Love the trees until their leaves fall off, then encourage them to try again next year.” — Chad Sugg
- “Autumn passes and one remembers one’s reverence.” — Yoko Ono
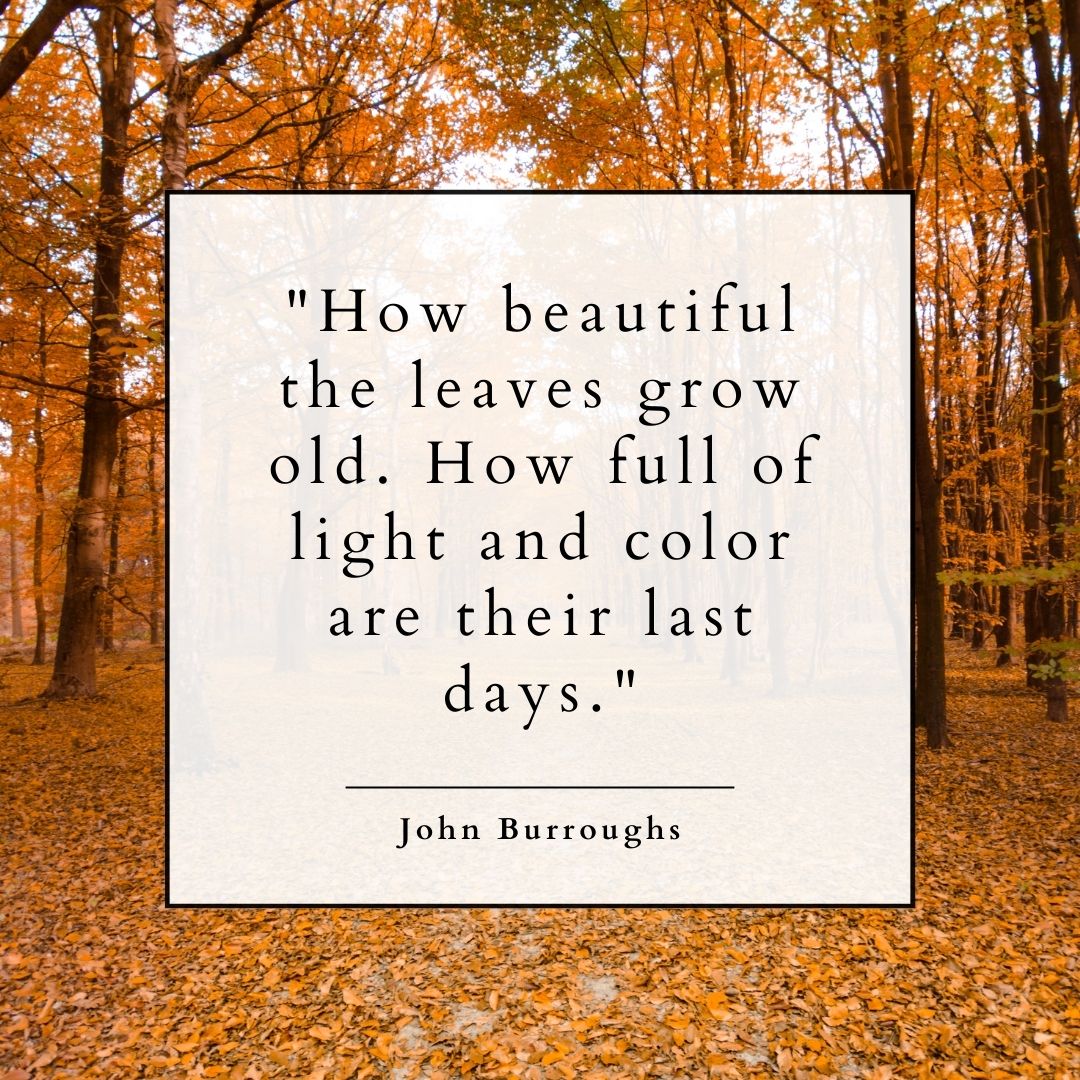
- “How beautiful the leaves grow old. How full of light and color are their last days.” — John Burroughs
- “I notice that Autumn is more the season of the soul than of nature.” — Friedrich Nietzsche
- “It looked like the world was covered in a cobbler crust of brown sugar and cinnamon.” — Sarah Addison Allen
- “Autumn teaches us the beauty of letting go. Growth requires release—it’s what the trees do.” — Ka’ala, @alohakaala
- “Autumn leaves falling down like pieces into place / And I can picture it after all these days.” — Taylor Swift
- “But I miss you most of all, my darling, when autumn leaves start to fall.” — Frank Sinatra
- “It’s autumn in New York / That brings the promise of new love / Autumn in New York / Is often mingled with pain.” — Ella Fitzgerald
- “It’s just my favorite time of the year. The whole world changes color.” — Gilmore Girls
- “I can smell autumn dancing in the breeze. The sweet chill of pumpkin, and crisp sunburnt leaves.” — Ann Drake
- “It is only the farmer who faithfully plants seeds in the Spring, who reaps a harvest in the Autumn.” — B.C. Forbes
- “Autumn is a second spring when every leaf is a flower.” — Albert Camus
- “Autumn lingered on as if fond of its own perfection.” — Winston Graham
- “By all these lovely tokens September days are here. With summer’s best of weather and autumn’s best of cheer.” — Helen Hunt Jackson
- “I loved autumn, the one season of the year that God seemed to have put there just for the beauty of it.” — Lee Maynard
- “I saw old Autumn in the misty morn. Stand shadowless like silence, listening to silence.” — Thomas Hood
- “Of the great harvest I myself desired.” — Robert Frost, “After Apple-Picking”
- “And the sun took a step back, the leaves lulled themselves to sleep and autumn was awakened.” — Raquel Franco
- “The first breath of autumn was in the air, a prodigal feeling, a feeling of wanting, taking, and keeping before it is too late.” — J.L. Carr
- “A sweater is like life, you get nothing out of it that you don’t put into it!” — Marilyn Monroe
- “There is something so special in the early leaves drifting from the trees – as if we are all to be allowed a chance to peel, to refresh, to start again.” — Ruth Ahmed
- “There is a harmony in autumn, and a luster in its sky, which through the summer is not heard or seen, as if it could not be, as if it had not been!” — Percy Bysshe Shelley
- “Is not this a true autumn day? Just the still melancholy that I love — that makes life and nature harmonize.” — George Eliot
- “It’s the first day of autumn! A time of hot chocolatey mornings, and toasty marshmallow evenings, and, best of all, leaping into leaves!” — Winnie the Pooh
- “The heat of autumn is different from the heat of summer. One ripens apples, the other turns them to cider.” ” — Jane Hirshfield
- “Listen! The wind is rising, and the air is wild with leaves, We have had our summer evenings, now for October eves!” — Humbert Wolfe
- “Nature’s first green is gold.” — Robert Frost, “Nothing Gold Can Stay”
- “I’m so glad I live in a world where there are Octobers.” — L.M. Montgomery
- “In autumn, don’t go to jewelers to see gold; go to the parks!”—Mehmet Murat Ildan
- “Never jump in a pile of leaves with a wet sucker.” — Linus, It’s the Great Pumpkin, Charlie Brown
Cute Fall Quotes
- “Pumpkin spice and everything nice.”
- “In every leaf, there’s a whisper of autumn’s magic.”
- “Autumn skies and pumpkin pies.”
- “Fall is proof that change is beautiful.”
- “Crisp air and cozy sweaters.”
- “The only thing I love more than fall is pumpkin spice.”
- “I’m a fall fanatic. Give me all the flannel, pumpkins, and crisp air.”
- “Autumn leaves and pumpkins, please.”
- “Every pumpkin needs a little spice.”
- “Hello, October! Let’s make some memories.”
- “Autumn is nature’s way of saying, ‘Let’s play!’”
Short Fall Quotes
- “Fall is here!”
- “Autumn: the season that teaches us to let go.”
- “Falling leaves, cozy evenings.”
- “Hello, fall! I’ve missed you.”
- “Sweater weather is better together.”
- “Falling for autumn.”
- “Autumn leaves and pumpkins, please.”
- “A leaf is a letter sent from the trees.”
- “Fall, the season of cozy.”
- “The magic of autumn is in the air.”
- “Sweater weather is better together.”
- “Falling leaves are like dancing dreams.”
- “The best time for new beginnings is now.”
- “Autumn leaves and hot cocoa dreams.”
- “Fall is my favorite color.”
Funny Fall Quotes
- “In the entire circle of the year, there is no time so delightful as the first afternoon in autumn.”
- “I’m on a seafood diet. I see food and I eat it. That’s why I need to wear sweaters in the fall.”
- “My favorite fall activity is going back to school shopping. Who’s with me?”
- “Fall is my favorite season because it involves pumpkin pie and hot apple cider.”
- “I like my coffee like I like my autumn: pumpkin-spiced and cozy.”
- “When life gives you pumpkins, make pumpkin pie!”
- “If you don’t like fall, you can leaf me alone.”
- “Autumn leaves and winter sweaters are my favorite.”
- “I’m just here for the fall decorations and the pumpkin spice lattes.”
Fall Quotes for Instagram
- “Leaves are falling, autumn is calling.”
- “Fall is proof that change is beautiful.”
- “Autumn leaves and pumpkins, please.”
- “Hello, October! Let’s make some memories.”
- “Autumn skies and pumpkin pies.”
- “The only thing I love more than fall is pumpkin spice.”
- “Crisp air, cozy sweaters, and falling leaves.”
- “Autumn skies and pumpkin pies.”
- “Pumpkin spice and everything nice.”
Related Resources to Fall Quotes
 As the leaves turn to their vibrant autumn hues and the air grows crisp, let these fall quotes add a touch of warmth and reflection to your season. Whether you’re sharing on social media, enjoying a cozy evening, or simply soaking in the beauty of autumn, these quotes capture the essence of fall in all its glory. Embrace the season’s charm, share a laugh, and let the magic of fall inspire you in every moment. Happy autumn!
Additional Resources: