


Graduating is one of life’s biggest milestones, marking the end of an unforgettable chapter and the start of an exciting new journey. It’s a moment worth celebrating, and what better way to do that than by throwing a memorable graduation party? Whether you’re organizing a small gathering with family or a big bash with friends, finding the right graduation party ideas can help you plan an event that honors your achievements and sets the stage for the future.
From choosing the perfect theme to creating unforgettable moments with decor and activities, this guide will inspire you to make your graduation celebration one for the books.
How to Plan a Graduation Party
Planning a memorable graduation party takes some thought and organization, but with a few simple steps, you can create an unforgettable celebration for your graduate. From deciding on the type of party to making a guest list and choosing a date, laying the groundwork is key. Whether it’s a casual backyard get-together or a formal dinner, planning ahead will ensure everything runs smoothly. Let’s explore the steps to throwing the perfect celebration with this graduation party planning checklist.
1. Decide What Type of Graduation Party You Want
Before diving into the details, think about the overall vibe you want to create. Are you envisioning a cozy gathering with close family and friends, or a big, lively celebration with classmates and neighbors? This decision will shape everything from the guest list to the venue, helping you define whether it’s a formal sit-down dinner, a backyard BBQ, or a themed party full of fun activities. Think about what atmosphere will feel the most special to the graduate, and what kind of experience you want everyone to walk away with.
2. Set a Budget
Set a budget that covers all party essentials like food, decor, and entertainment. By knowing how much you’re willing to spend upfront, you can prioritize where to allocate funds and make smart choices. This will help keep costs under control without sacrificing the celebration.
3. Pick the Perfect Date
Choose a date that works around other graduation events and school commitments, giving guests plenty of notice. Planning early ensures everyone can attend and makes scheduling vendors and venues easier.
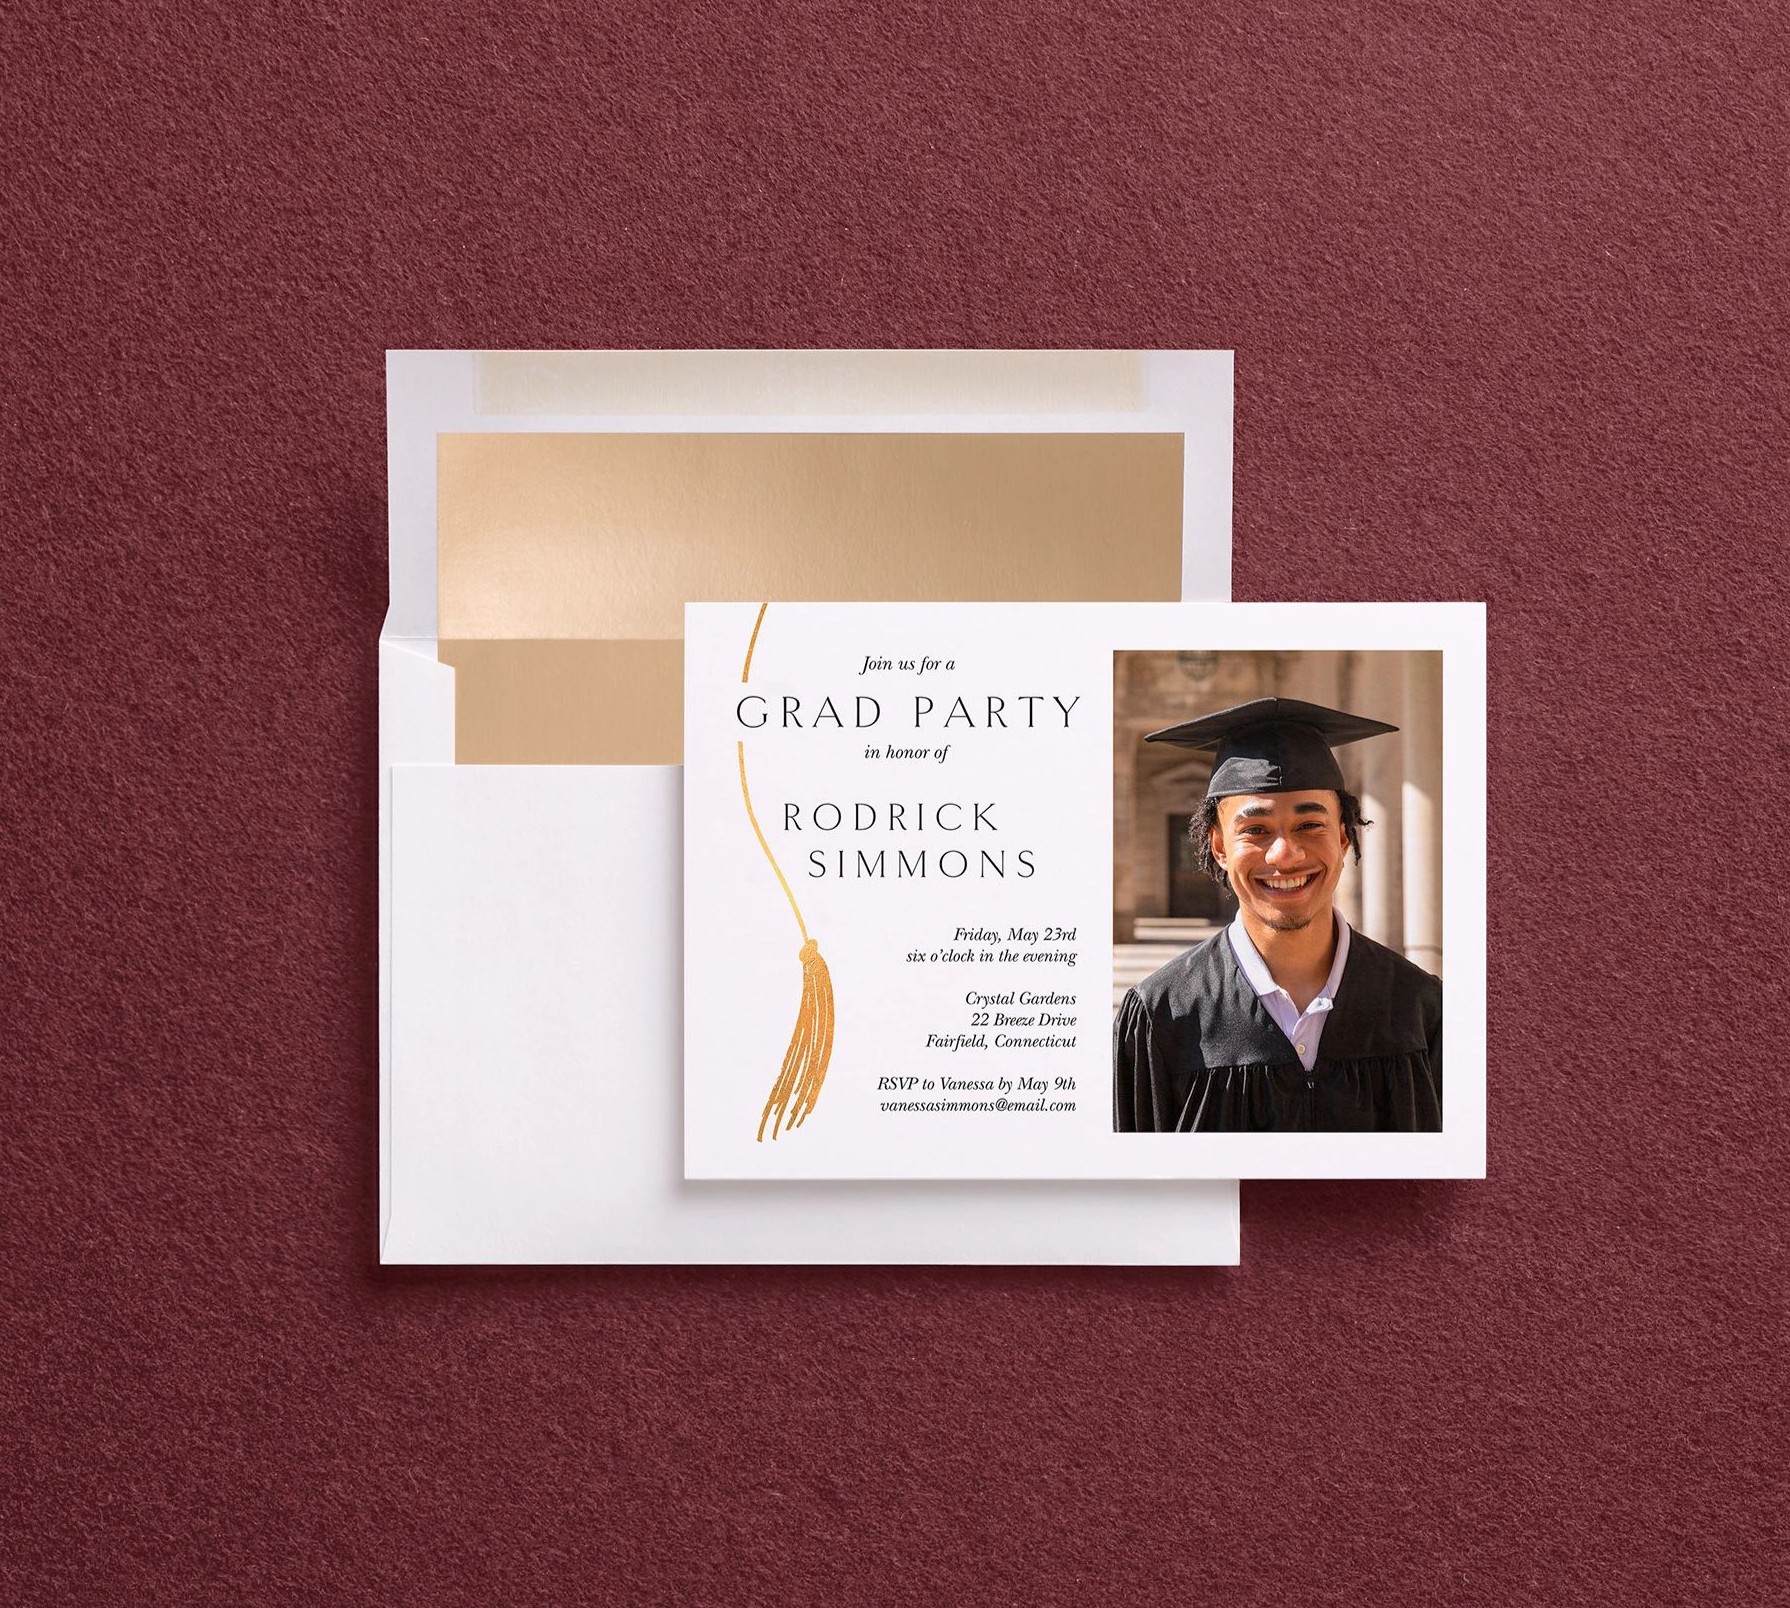
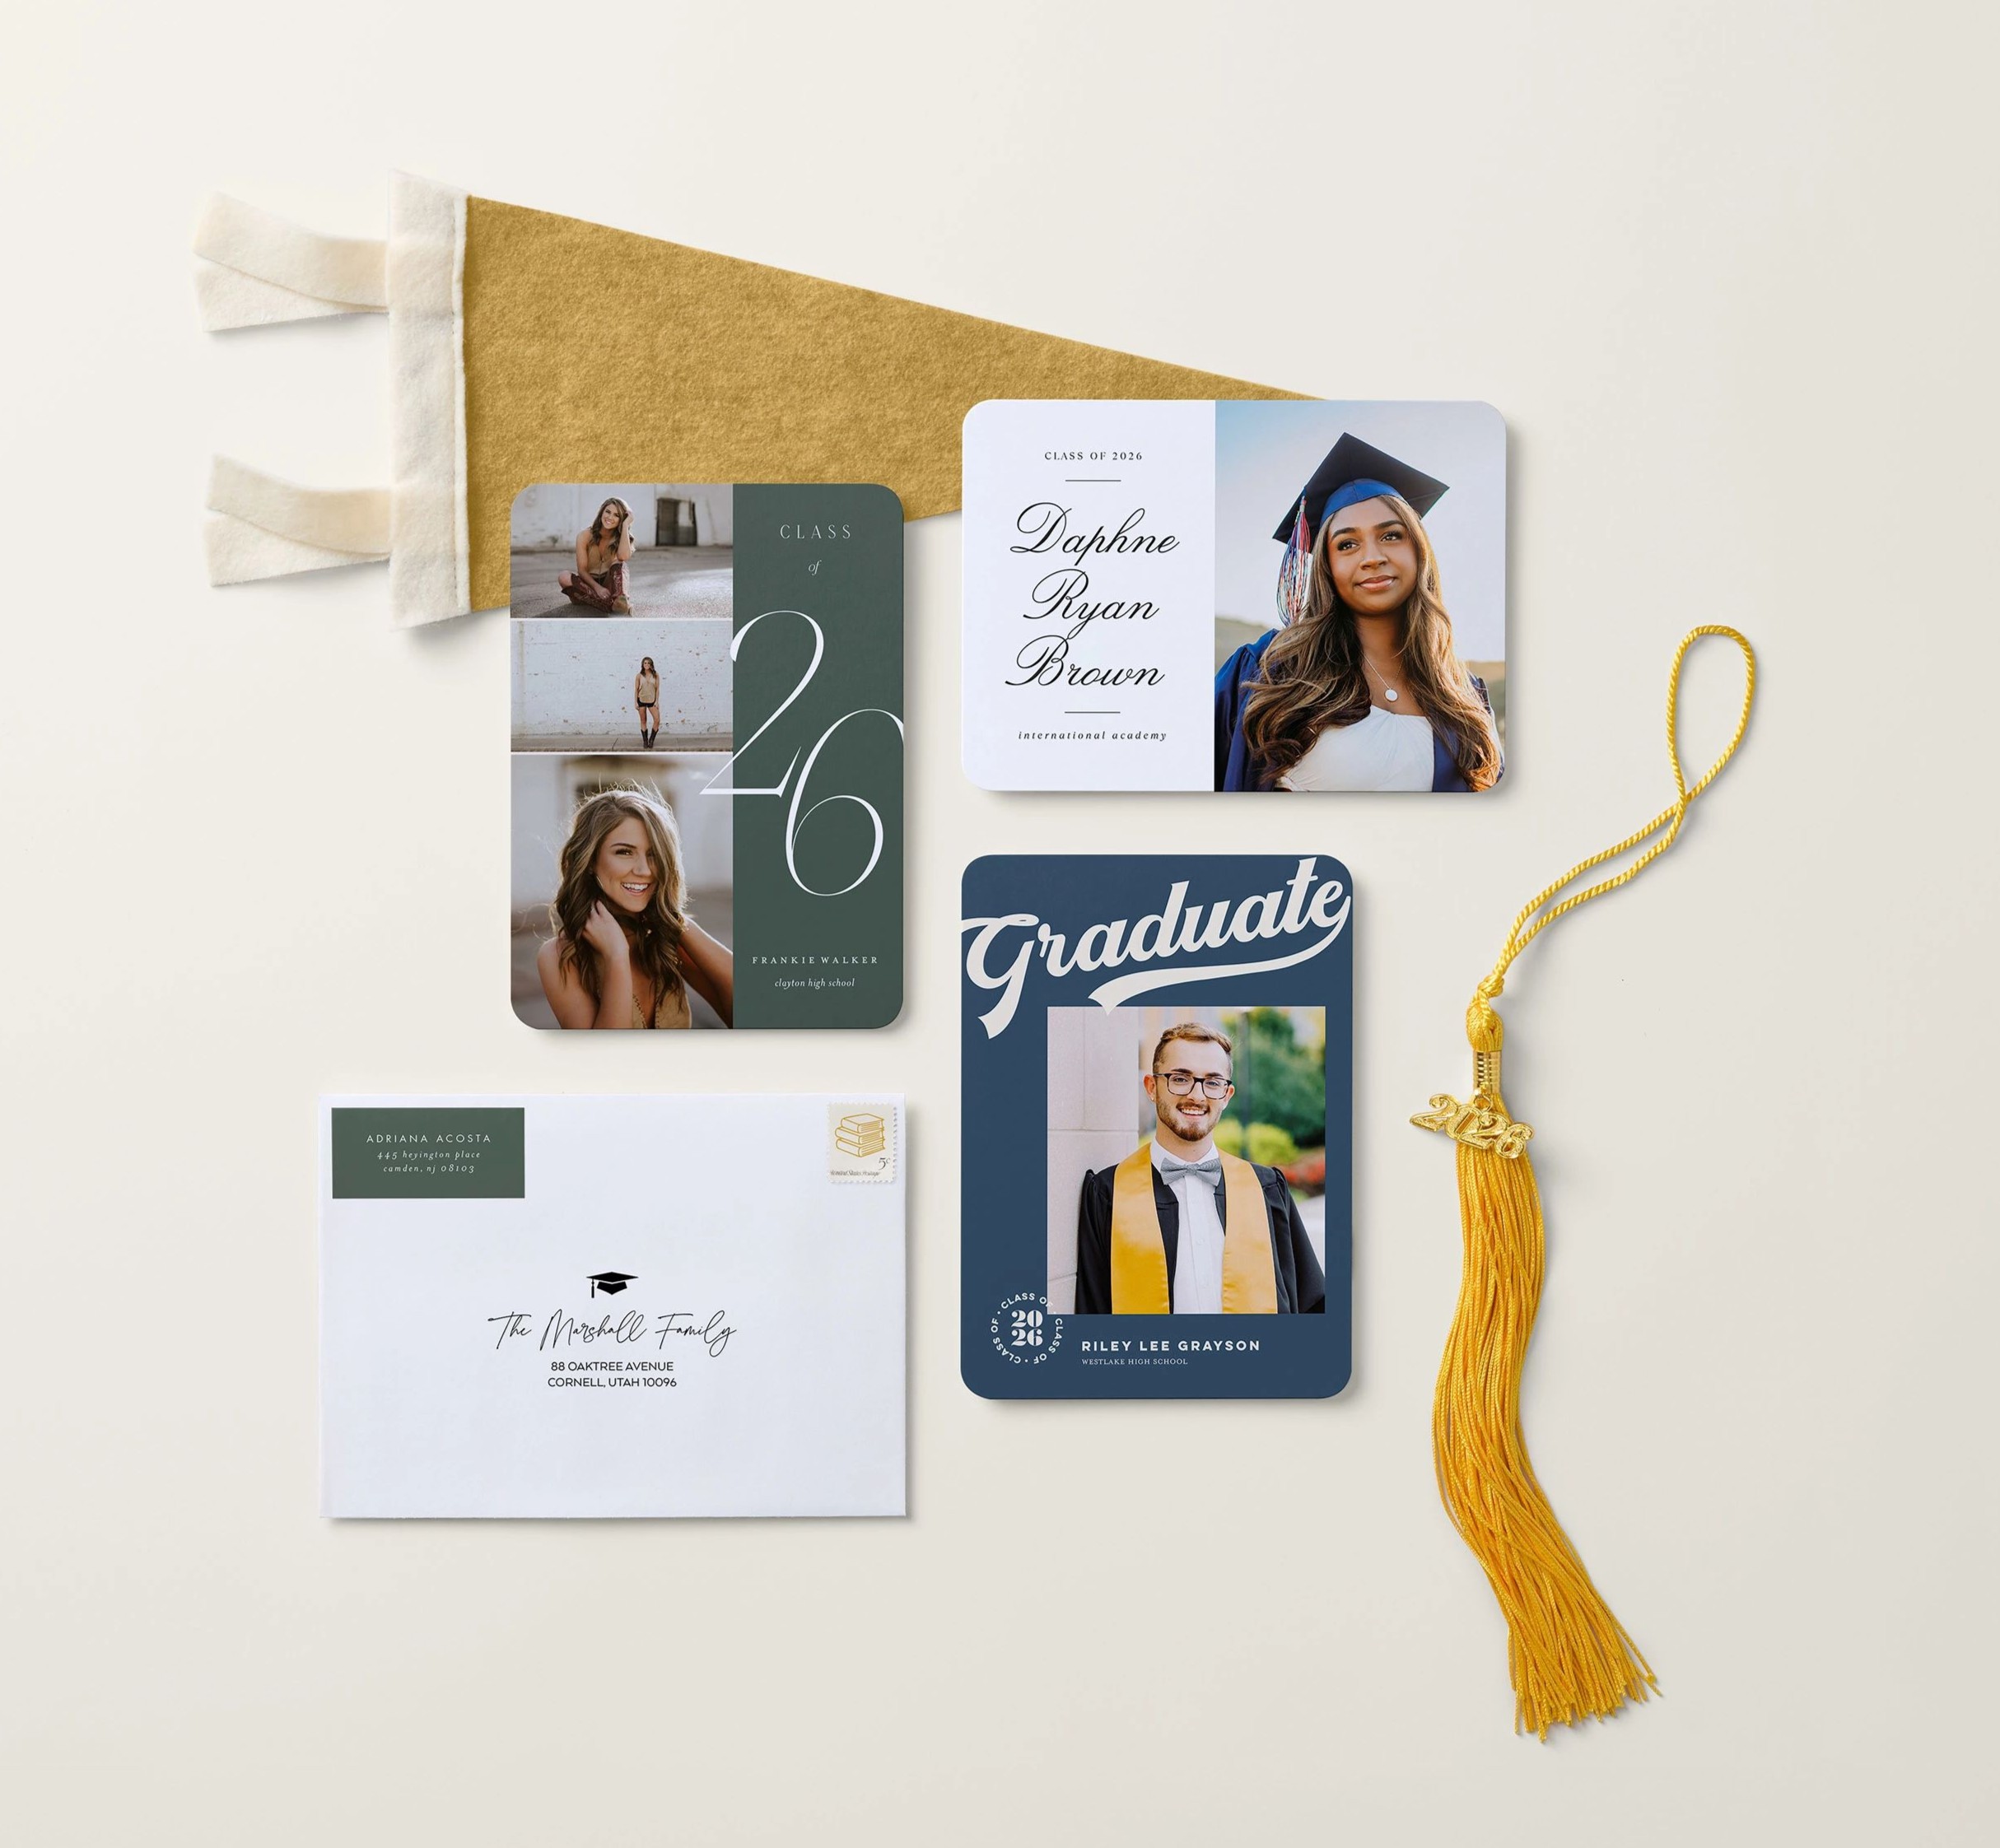
4. Send Out Graduation Invitations
Design and send graduation party invitations that reflect your event’s theme or style, whether casual or formal. Aim to send them 4-6 weeks ahead of the event so guests can RSVP. Personalized invites add a special touch and set the tone for the celebration.
5. Make a Graduation Party Playlist
Create a playlist of the graduate’s favorite songs, mixing in upbeat tunes and nostalgic tracks from their school years. Music helps keep the energy alive and sets the mood for the entire event. A custom playlist can make the party feel even more personal and memorable.
Need inspiration? Check out our guide to Graduation Songs for 2026.
6. Plan a Dress Code
Decide if you want a formal event, casual gathering, or a themed dress code to align with your party theme. A specific dress code adds a fun twist and helps guests know how to dress for the occasion. From black tie to Hawaiian shirts, make sure the dress code suits the overall vibe.
7. Create a Party Timeline
Plan a timeline of activities to keep the party organized and flowing smoothly. Schedule important moments like toasts, cake-cutting, and games. This way, you can fit everything in without feeling rushed, ensuring each part of the event gets its time to shine.
8. Rent or Borrow Equipment
For larger parties or outdoor gatherings, consider renting tables, chairs, tents, or a sound system to accommodate all guests. It’s a simple way to ensure everyone is comfortable and you have everything needed. Borrowing from friends or family can also help reduce costs.
9. Prepare for Bad Weather
If you’re hosting outdoors, always have a contingency plan in case of rain or extreme weather. Renting a tent or reserving an indoor backup space can ensure the party goes on no matter what. Planning ahead keeps everyone comfortable and stress levels low.
10. Designate a Photographer
Assign a friend or hire a professional to capture the highlights of the day. This allows you and your guests to enjoy the celebration without worrying about taking photos. It ensures you’ll have beautiful memories to look back on after the party.
11. Have a Plan for Speeches
Whether it’s the graduate, family members, or close friends, plan for a moment when speeches or toasts can be made. This is a meaningful time to acknowledge achievements and share stories, making the celebration feel extra special.
Graduation Party Theme Ideas
A great theme can add an extra layer of fun and personalization to your graduation party. It ties together the decor, food, and overall vibe of the event. Some themes are playful, while others reflect the graduate’s journey or future plans. Whether you’re aiming for something simple or something more elaborate, these graduation party themes can help set the tone for a memorable celebration.
12. New Major-Themed
Celebrate the graduate’s future by creating a party theme based on their chosen major. For example, if they’re pursuing a career in medicine, decorate with medical symbols, a lab coat photo booth, and snack tables featuring “prescription” treats. Tailoring the decor and activities to their field of study can make the event feel even more personal and fun.
13. Future School or City Theme
Highlight the graduate’s next big step by theming the party around their new college, school, or city. Use their new school’s colors and mascot for decorations, or incorporate iconic elements from the city they’ll be moving to. For example, if they’re heading to New York City, feature a skyline backdrop, subway signs, and foods like pretzels and pizza to tie the theme together.
14. Potluck
A potluck is a great option for a more relaxed and community-oriented gathering. Ask each guest to bring a dish, creating a diverse spread of food options. You can even ask attendees to bring dishes that represent the graduate’s journey — meals from their childhood, favorite dishes, or recipes that represent their future school or job.
15. Garden Party
For a beautiful outdoor celebration, a garden-themed party is perfect. Decorate the space with fresh flowers, greenery, string lights, and rustic seating arrangements. This theme works well in spring and summer, allowing guests to enjoy the fresh air while celebrating the graduate’s big accomplishment.
16. Classic Graduation Theme
Celebrate with timeless decor by using graduation caps, diplomas, and the graduate’s school colors to create a classic setting. Incorporate graduation-themed props like cap-and-gown photo booths, banners with the graduate’s year, and custom napkins or balloons featuring the school logo. This theme is a great way to honor the traditional aspects of the achievement.
17. Tropical Luau
Transform your space into a tropical paradise with a luau theme. Decorate with bright and colorful leis, tiki torches, palm leaves, and floral centerpieces. Offer tropical drinks in coconut cups and serve island-inspired snacks like pineapple skewers or Hawaiian barbecue. A luau is perfect for an outdoor or poolside graduation celebration and adds a festive, summer vibe.
18. Hollywood Glam
Give the graduate the star treatment with a Hollywood glam party. Roll out a red carpet for guests to walk, add glitzy gold and black decorations, and set up photo stations with movie-themed backdrops. Offer “celebrity” name tags, serve fancy hors d’oeuvres, and hand out awards as party favors. This theme brings the elegance and excitement of a glamorous movie premiere to your graduation celebration.
19. Future Adventure Theme
Celebrate the graduate’s next chapter with a travel-themed party. Use maps, globes, and travel-inspired decor to symbolize future adventures. Invite guests with custom passport-style invitations, decorate with luggage tags, and include globes or vintage suitcases as centerpieces. For a fun touch, set up a “Wish You Were Here” station where guests can write their well-wishes on postcards.
20. Sports Theme
Highlight the graduate’s love of sports or the sport they played in school with a sports-themed party. Decorate with team jerseys, pennants, and banners in their favorite team’s colors. Use trophies as centerpieces, and serve food from the concession stand classics like hot dogs, popcorn, and nachos. You can even set up games like cornhole or mini basketball hoops for guests to enjoy.
21. Decade Throwback
Take a trip back in time with a decade-themed party. Choose a specific decade like the ’80s or ’90s, and encourage guests to dress the part. Play music from that era and decorate with iconic items like neon colors for the ’80s or grunge aesthetics for the ’90s. Add a nostalgic photo booth with props from the decade to bring the theme to life.
22. Black & White Formal
For an elegant and sophisticated graduation party, opt for a black-and-white formal theme. Decorate with sleek, monochromatic touches, including black tablecloths, white flowers, and formal dinnerware. Guests can dress in black-tie attire, and you can set up a photo booth with a glamorous backdrop to capture the evening’s upscale vibe.
Best Places to Have a Graduation Party
Choosing the right venue can make a big difference in the success of your graduation party. The location should match the formality of the event and accommodate the number of guests you’re inviting. From cozy backyard gatherings to chic rented venues, here are some popular options to consider for hosting your party.
23. Backyard Party
A backyard celebration is perfect for an intimate, relaxed gathering with close friends and family. String lights, graduation banners, and lawn games instantly create a festive atmosphere, while food stations or a buffet keep things casual. It’s also one of the easiest venues to personalize with photos, school colors, and memory displays.
24. Community Center
Community centers are a great option for larger guest lists without the high price tag. These spaces typically offer plenty of room for dining, dancing, and activities, plus flexibility when it comes to decorations and layouts. It’s a practical choice if you want structure and space without sacrificing personality.
25. Local Park
A local park offers a scenic, family-friendly setting with built-in seating, open space, and room for kids to play. Picnic tables, food trucks, or casual catering work especially well here. Just be sure to check permit requirements and have a backup plan in case of weather.
26. Restaurant Private Room
Hosting your party in a restaurant’s private room is a stress-free option that feels polished and effortless. With food, drinks, and service handled for you, it’s ideal for smaller, more formal celebrations or milestone graduations. Many restaurants also offer customizable menus to suit different tastes and budgets.
27. Rooftop Party
If you have access to a rooftop, it makes for a memorable and modern celebration. City views, lounge seating, and string lights create a stylish backdrop that feels extra special. This venue works especially well for evening parties or smaller guest lists looking for a chic, urban vibe.
28. Banquet Hall
For large-scale celebrations, a banquet hall offers the space and flexibility to go all out. There’s room for elaborate décor, a dance floor, entertainment, and formal seating arrangements. This option is ideal if you’re hosting a big crowd or planning a more traditional, reception-style event.
Graduation Party Decor Ideas
The decor is what will make your graduation party visually pop. Whether you’re going for a classic or modern look, decorations help set the atmosphere and bring your theme to life. From custom banners to stylish yard signs, adding personalized and thoughtful touches to your graduation party decorations will ensure a festive and celebratory environment.
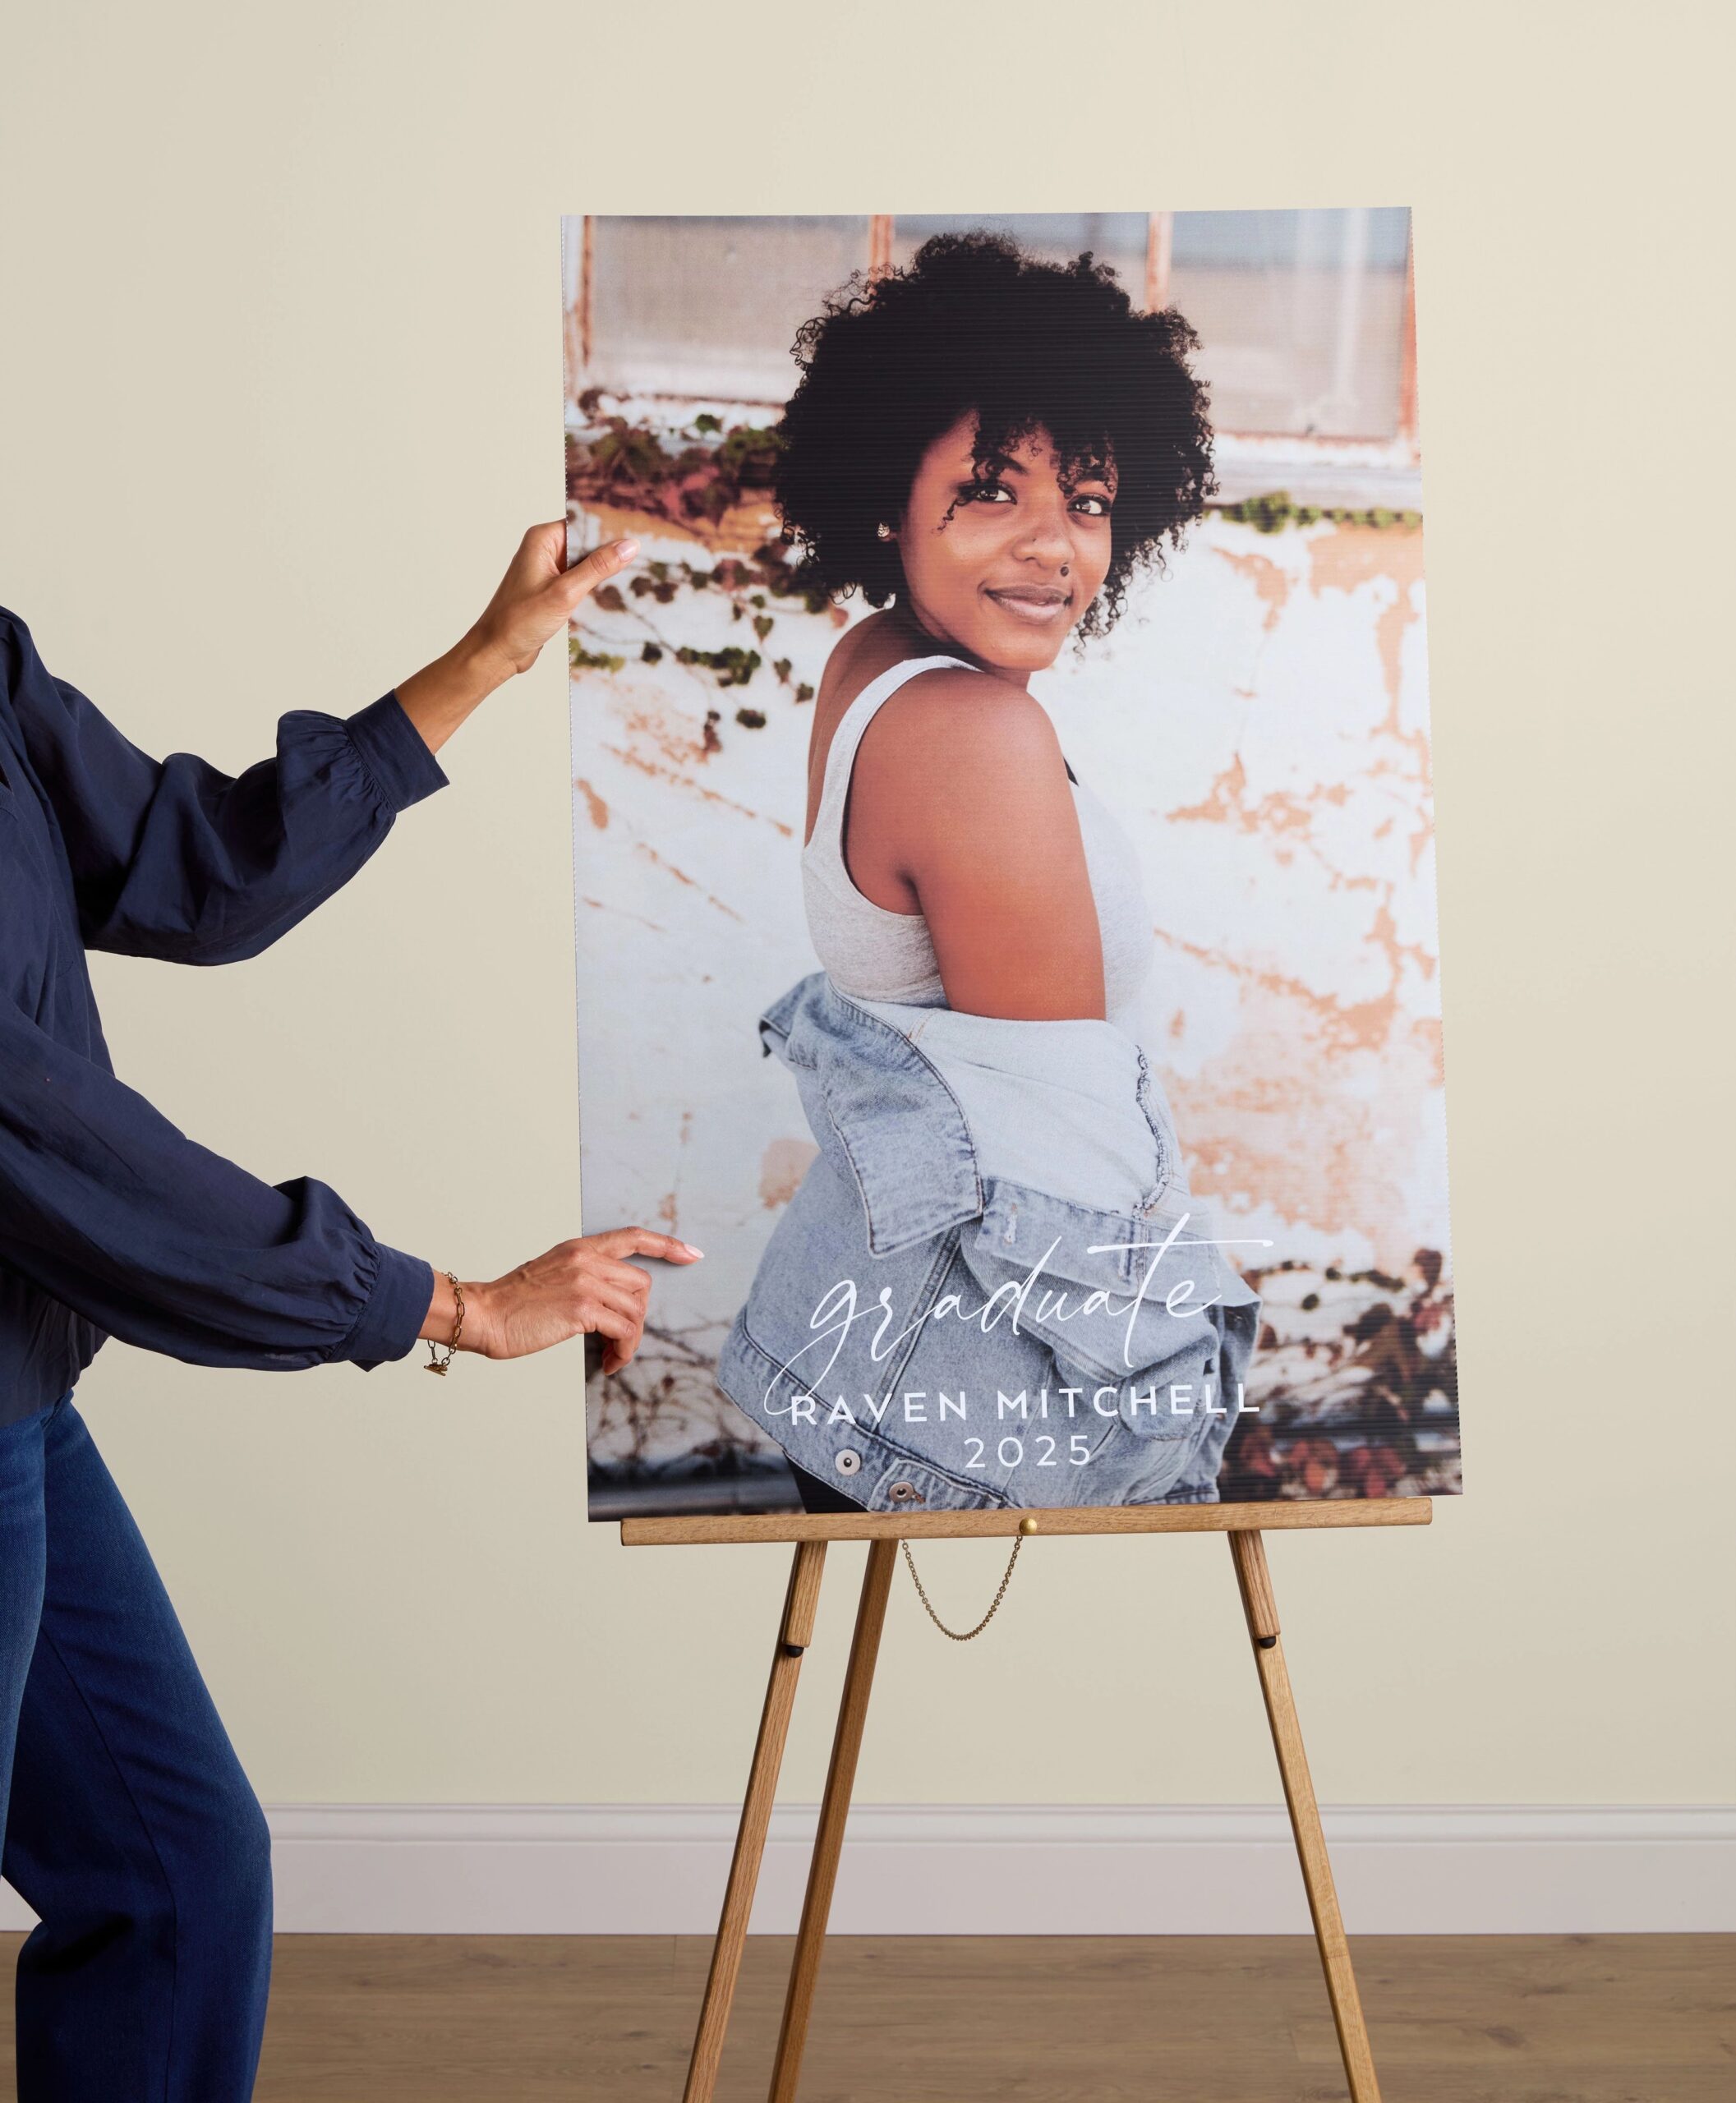
29. Personalized Graduation Posters
Craft a nostalgic display with personalized graduation poster boards filled with photos of the graduate’s journey, from their first day of school to their cap-and-gown moment. This trip down memory lane will be both heartwarming and a great conversation starter.
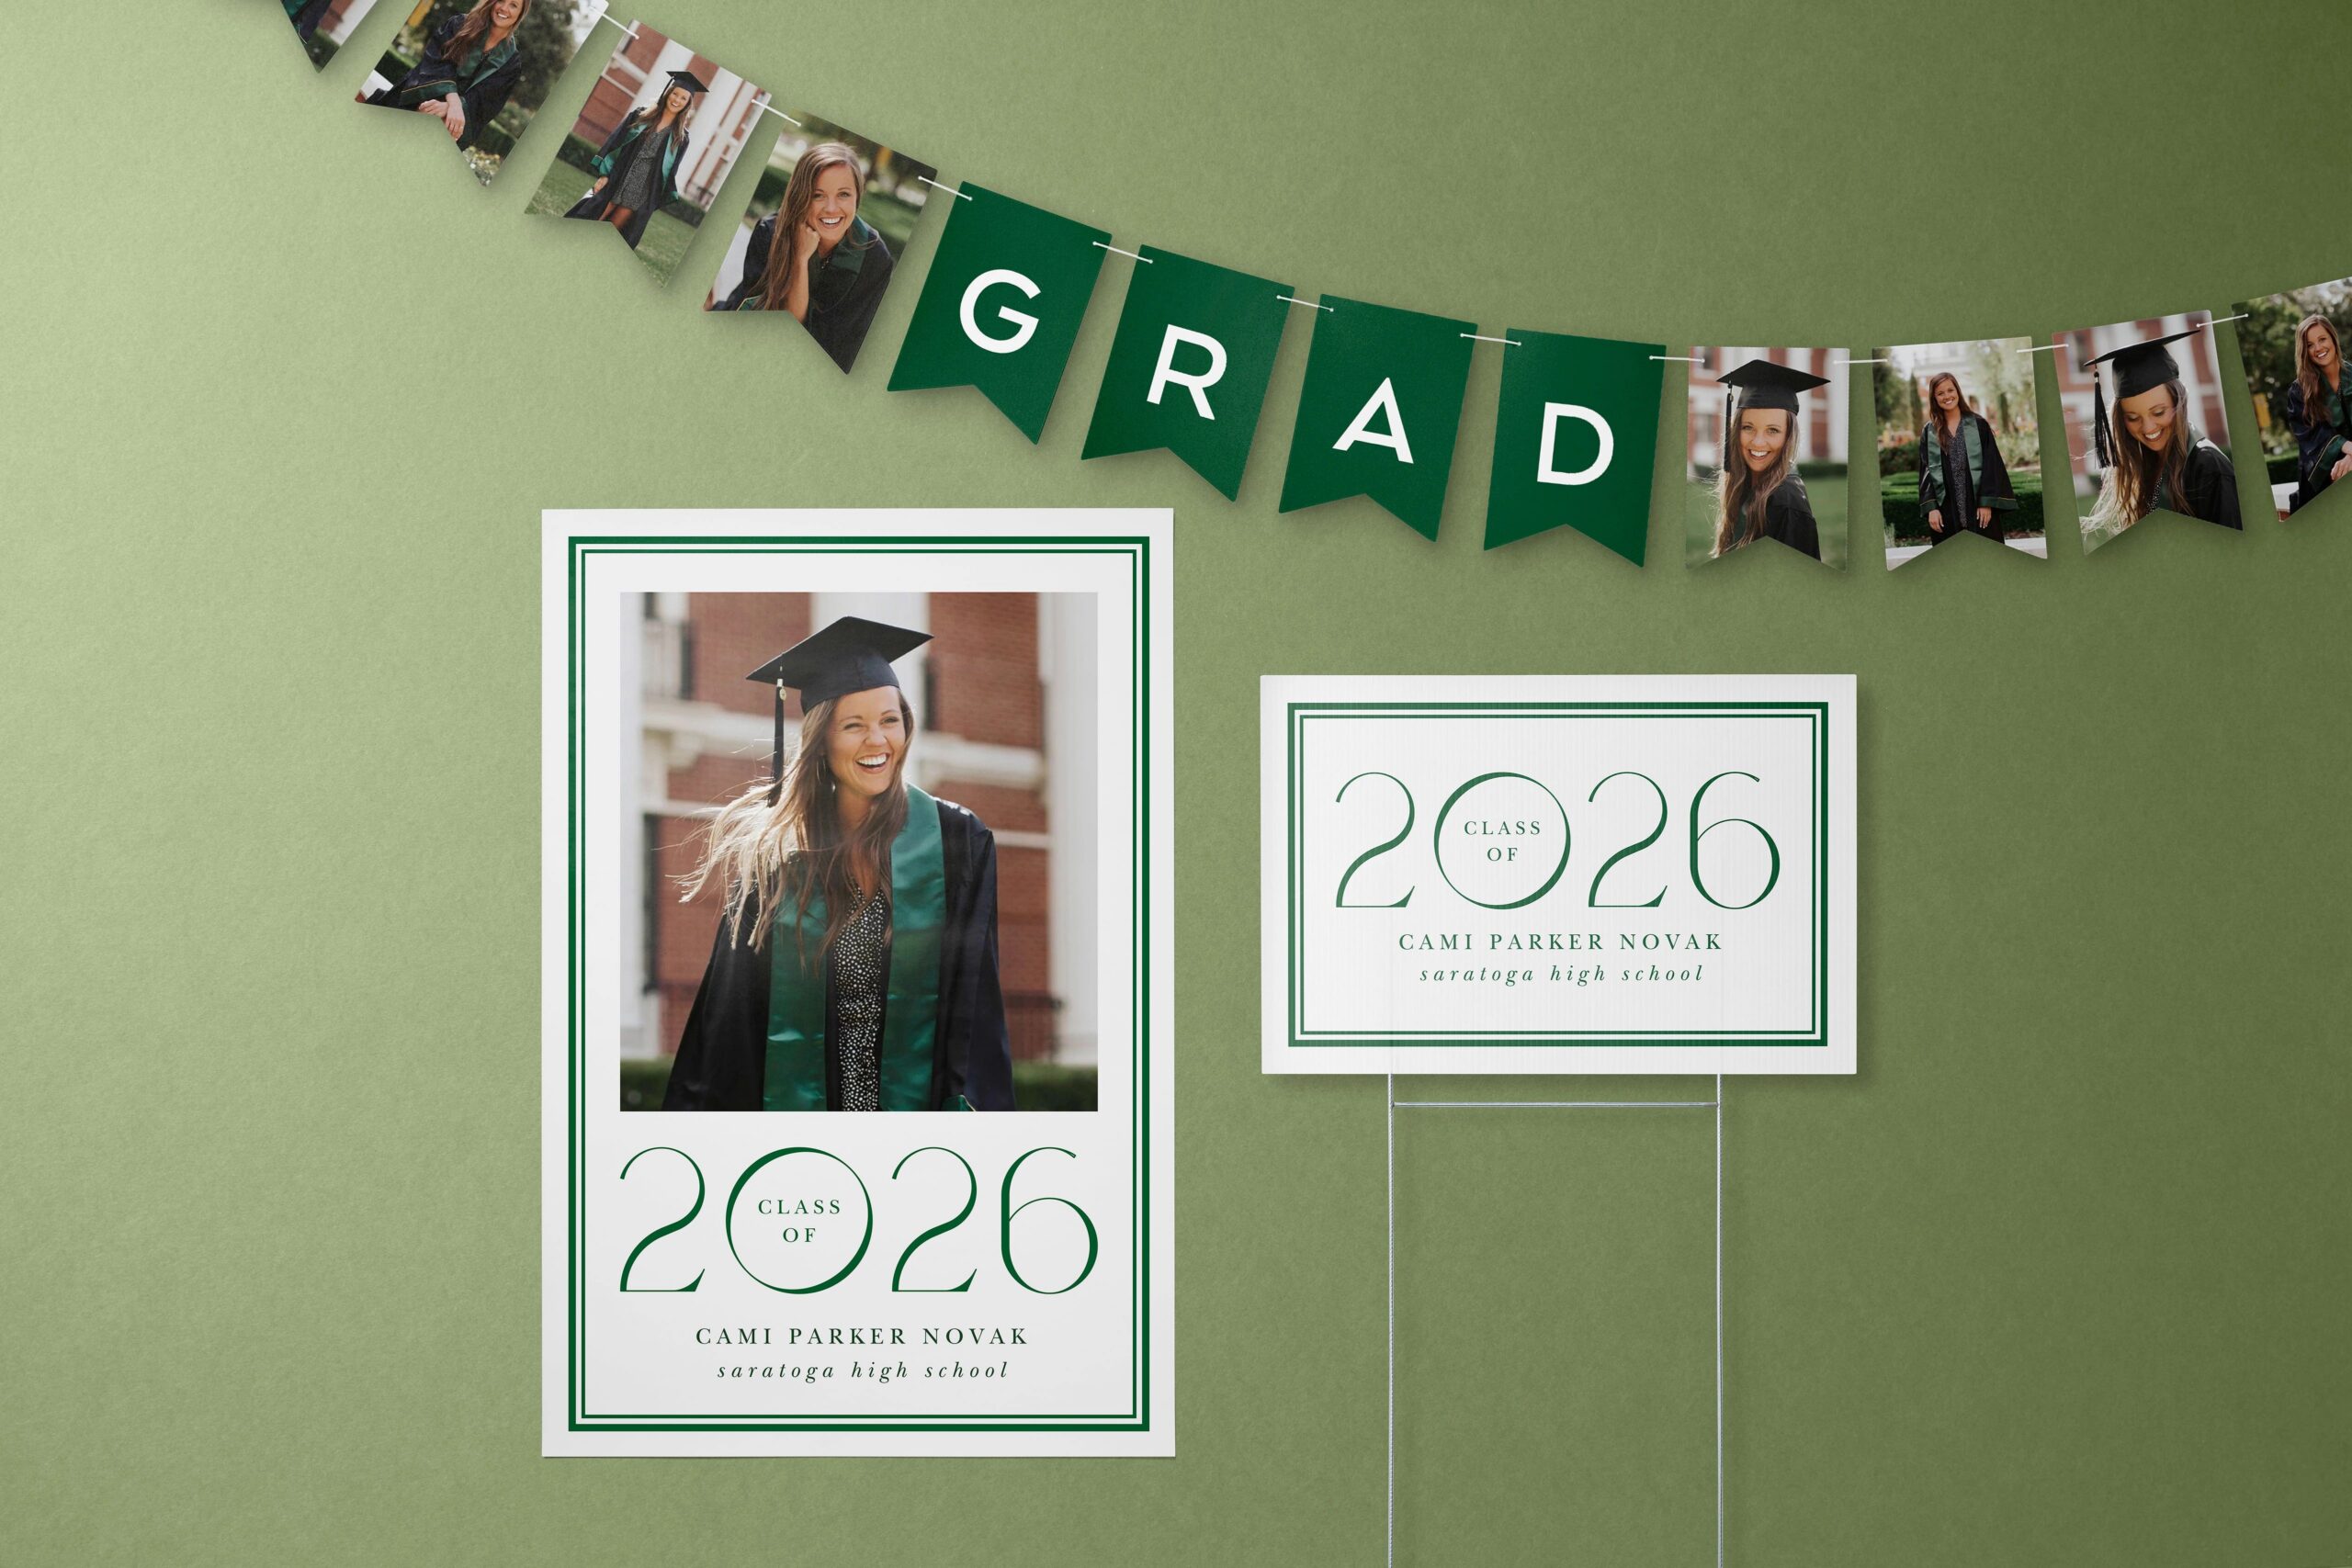
30. Balloon Arches
Make a grand entrance with a vibrant balloon arch in your graduate’s school colors. It’s the perfect way to frame the space, making it Instagram-worthy and adding that extra wow factor to your decor.
31. Words of Wisdom Station
Create a cozy nook where guests can share their heartfelt advice, funny stories, or words of wisdom for the graduate. Provide notecards and a stylish box for guests to drop in their notes – a beautiful keepsake the grad can treasure for years to come.
32. Yard Signs
Make your celebration impossible to miss with vibrant, personalized graduation yard signs. These signs not only guide guests to the party but also let the whole neighborhood know it’s time to celebrate a major achievement!

33. Photo Booth Setup
Let guests capture the fun with a DIY photo booth decked out in props like oversized graduation caps, quirky signs, and school colors. Create a custom backdrop with tassels, balloons, or a personalized graduation banner for share-worthy photos.
34. Memory Wall
Invite guests to contribute to a memory wall by hanging up photos, special moments, and funny memories with the graduate. It’s a sentimental way to involve everyone and celebrate the highlights of the grad’s journey.
35. Gift Table with a Personal Touch
Transform a simple graduation gift table into a beautiful display. Decorate it with personal touches like framed photos of the grad, flowers, and a unique sign inviting guests to drop their gifts and cards. Make it a centerpiece by adding balloons or string lights for an extra festive vibe.
36. Banners & Bunting
Celebrate the guest of honor with custom graduation banners and bunting showcasing their name, graduation year, and even a favorite quote. Whether hung at the entrance or as a backdrop, this decor sets the celebratory tone the moment guests arrive.
37. String Lights & Lanterns
For evening parties, string lights and lanterns add a warm glow and magical ambiance to any outdoor or indoor space.
38. Keepsake Display
Celebrate your graduate’s accomplishments with a keepsake display that showcases their achievements, awards, or mementos from their school years. This personalized decor not only honors their hard work but adds a meaningful touch to the party.
Graduation Table Decor Ideas
The tables at your party are not just functional—they can also be stylish and serve as the centerpiece of your celebration. With the right table decor, you can add flair and personality to the party while also incorporating keepsakes and special memories. Check out these ideas for napkins, photo displays, centerpieces, and more to dress up your graduation party tables.
39. Custom Napkins
Personalize graduation napkins featuring the graduate’s name, school, or class year add a subtle but meaningful detail to each place setting. They’re an easy way to tie in school colors and elevate your table decor without a lot of extra effort.
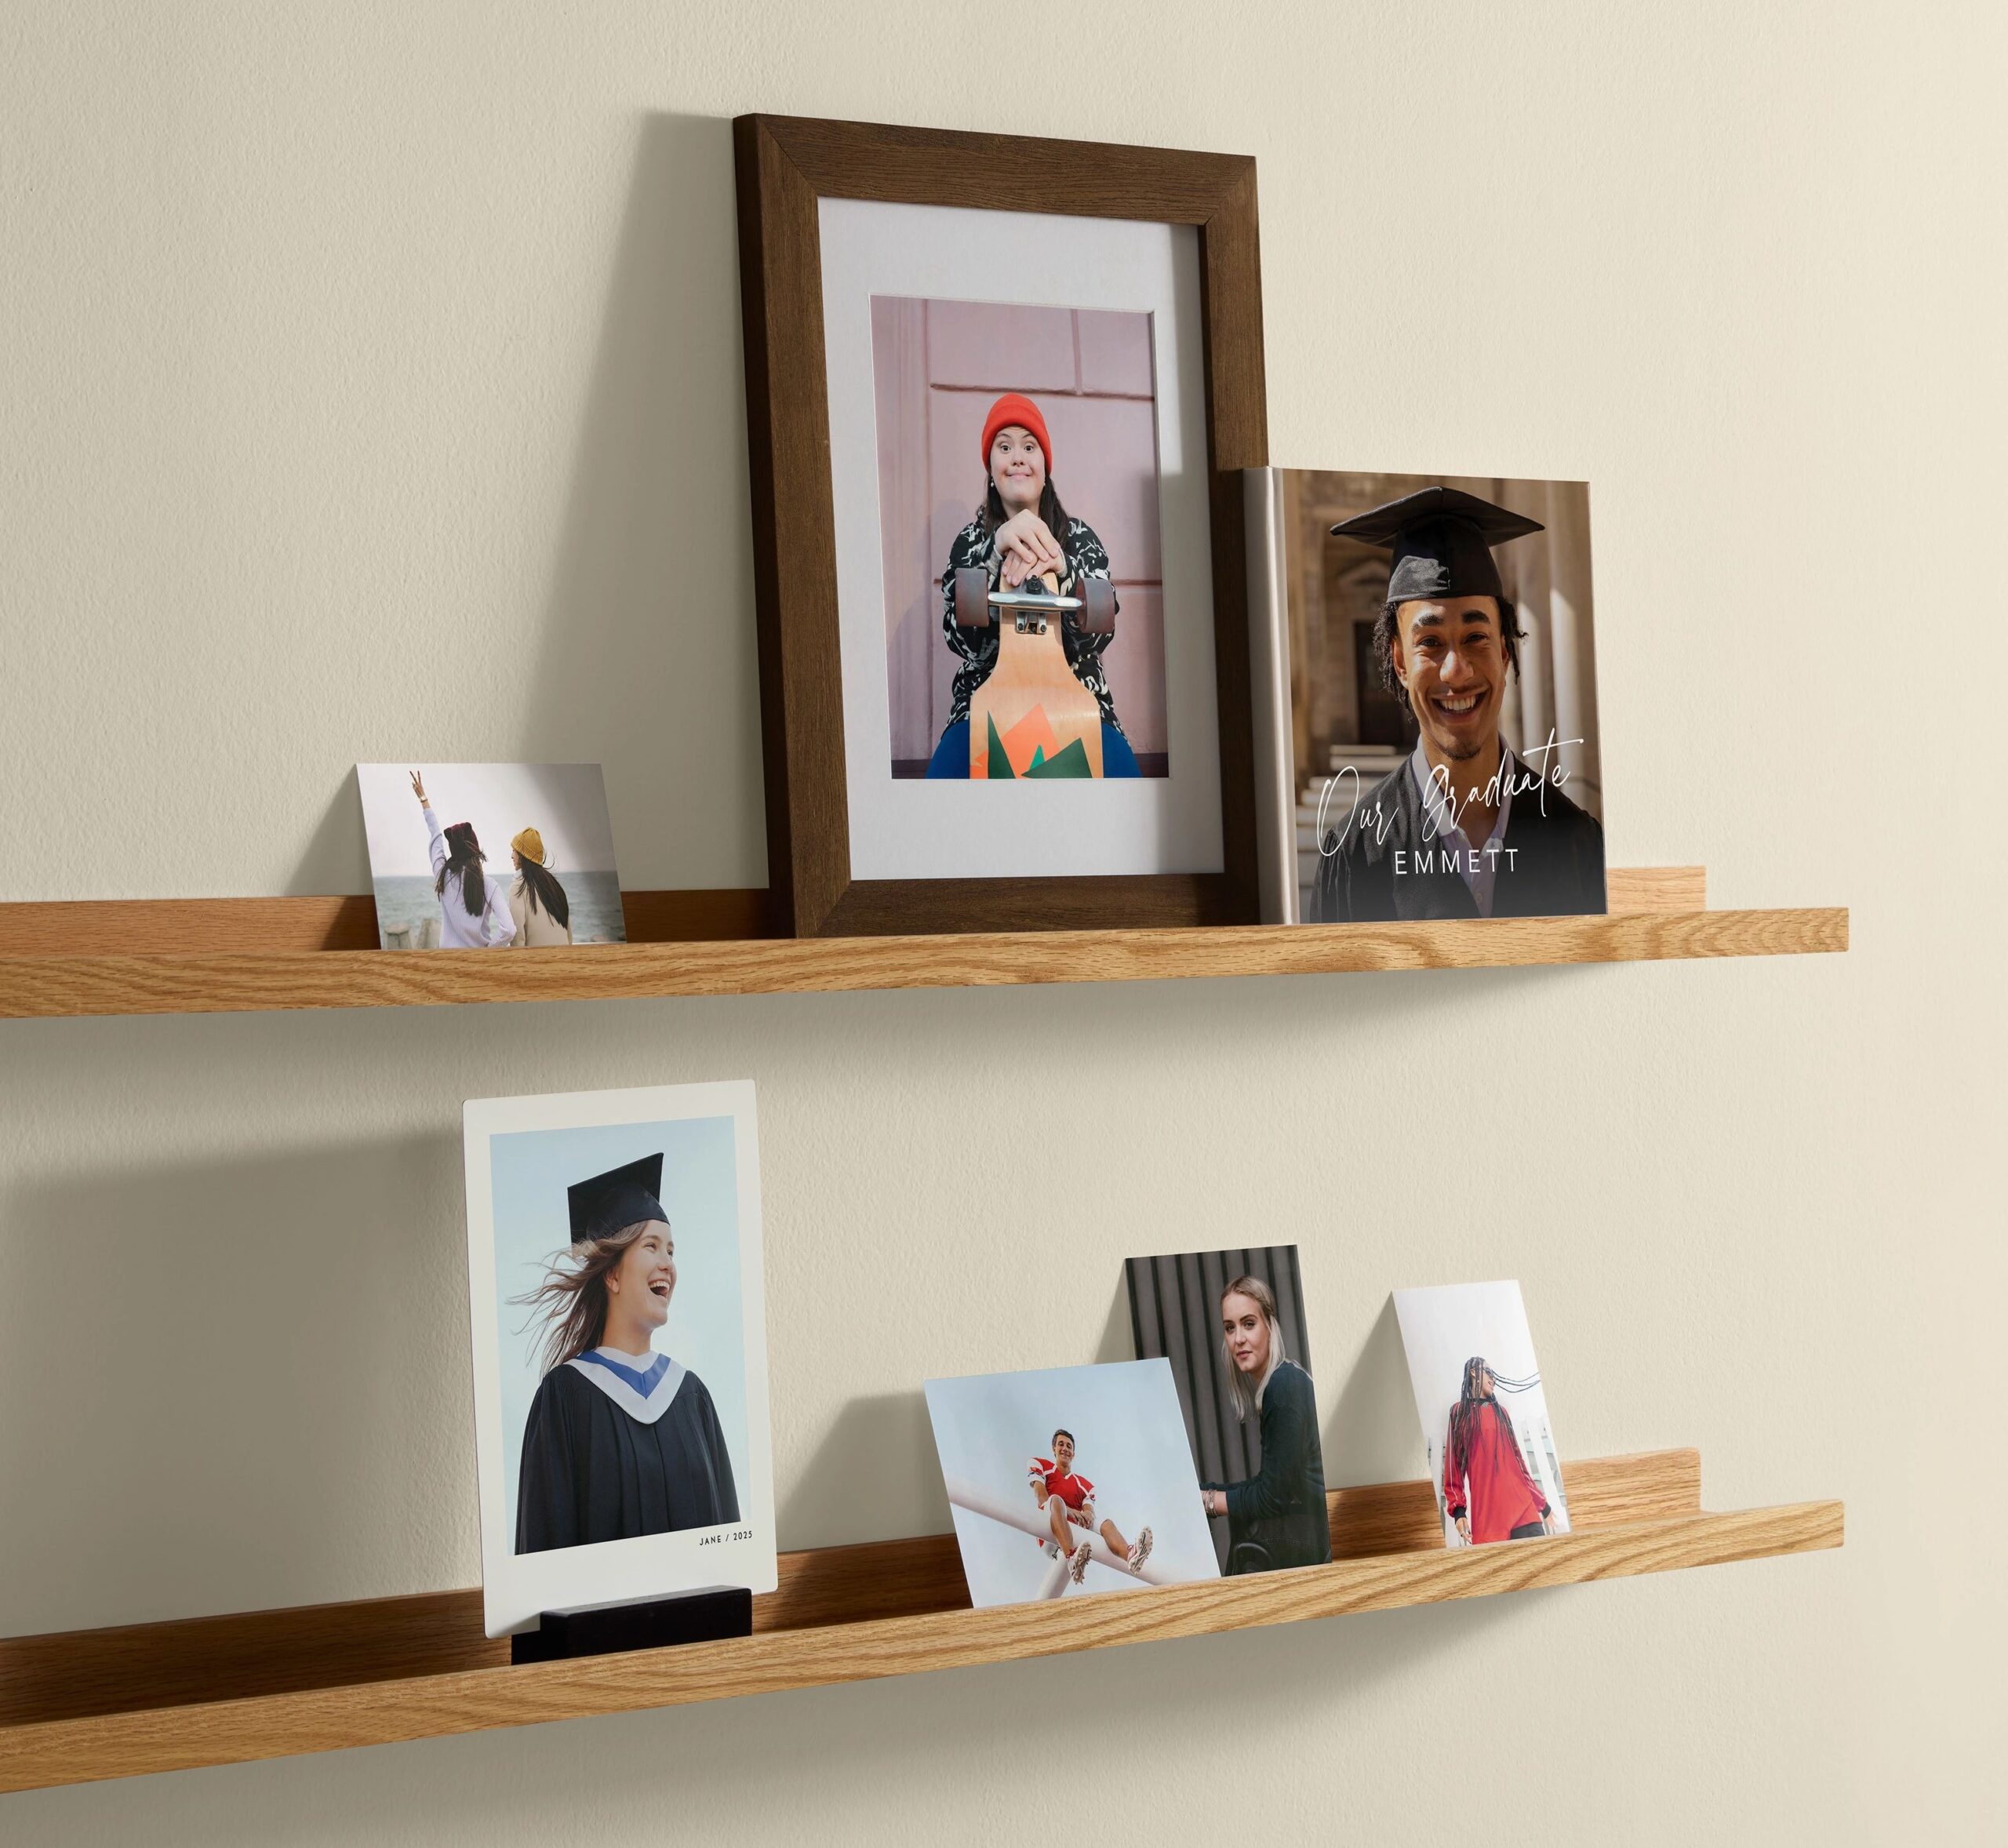
40. Photo Displays on Tables
Add framed photos or small photo books to each table so guests can flip through memories from the graduate’s childhood, school years, and big moments along the way. These displays naturally invite conversation and make the celebration feel more personal.
41. Graduation-Themed Guest Book
Set out a guest book where friends and family can leave notes, advice, or well wishes for the graduate. Choose a design that matches your theme or school colors, and place it at a central table so it becomes both a decor piece and a meaningful keepsake.
42. Themed Centerpieces
Centerpieces help anchor your tables and pull the entire look together. Use elements that match your theme — like balloons in school colors, simple floral arrangements, or candles paired with graduation accents — to create a cohesive and festive tablescape.
43. Personalized Tableware
Custom plates, cups, or utensil wraps printed with the graduate’s name or class year add personality to the table while still being functional. These pieces can also double as subtle party favors guests take home with them.
Graduation Party Activities
It’s important to keep your guests entertained throughout the party, and having fun activities planned is the perfect way to do that. Whether you’re hosting a large crowd or a more intimate gathering, activities can encourage interaction and make the event more enjoyable. From DIY photo booths to games and memory-making stations, here are some creative ideas to keep everyone engaged.
44. Graduation Cap Decorating Station
Set up a craft table where guests can design their own mini graduation caps. Provide markers, glitter, stickers, and other fun decorations to spark creativity. This interactive station gives everyone a chance to leave with a personalized keepsake, and it’s a great icebreaker for guests who might not know each other. Get inspired with our list of Graduation Cap Quotes & Ideas.
45. DIY Photo Booth with Props
Create a DIY photo booth with a backdrop that features the grad’s school colors, personalized signs, and fun props like oversized glasses, diplomas, and giant tassels. Add a few creative prompts or signs like “Class of [Year]” or “Future CEO” to get the photos flowing. It’s a fun way for guests to capture the moment and share it on social media.
46. Memory Lane Walk
Put together a “Memory Lane” where guests can walk through photos from the graduate’s life, from early school days to their senior year. Add milestones and personal notes from friends and family, turning this into an emotional and meaningful activity that celebrates the grad’s journey.

47. Karaoke Station
Turn up the fun by setting up a karaoke machine with a mix of nostalgic songs from the grad’s school years and current hits. It’s a surefire way to get guests laughing, singing, and celebrating the graduate’s big day in a lively, unforgettable way.
47. Outdoor Games
If you’re hosting outdoors, set up lawn games like cornhole, bocce ball, or giant Jenga. Customize the game boards or pieces with the graduate’s name or school colors for a personalized touch. These games are not only fun but also give guests of all ages a chance to relax and enjoy themselves.
48. Slideshow Presentation
Create a sentimental slideshow of the graduate’s school journey, from kindergarten to senior year. Use photos, videos, and music to set the tone, and plan a special moment during the party to play it. This is a wonderful way to reflect on the past and celebrate the future.
49. “Sign the Yearbook” Guest Book
Set up a creative guest book station where friends and family can leave messages, advice, or funny memories for the graduate. Decorate the station to look like a “yearbook,” and have everyone sign it throughout the night. It becomes a meaningful keepsake that the graduate can look back on for years to come.
50. Diploma Relay Race
Bring in a touch of humor with a graduation-themed relay race! Set up stations where guests complete mini challenges like balancing a “diploma” (a rolled-up piece of paper) on their head, running through an “obstacle course,” or answering trivia questions about the graduate. It’s a fun way to bring energy to the party and get everyone involved.
51. Graduation Advice Tree
Instead of a traditional guestbook, create a “Graduation Advice Tree.” Set up a small tree or decorative branches, and have guests write their advice, graduation wishes, or words of wisdom for the graduate on little tags that can be hung from the tree. This adds a creative, interactive decor element while allowing guests to share their heartfelt thoughts.
52. Guess That Year Trivia
Put together a fun trivia game that revolves around the graduate’s life. Include questions about their school years, favorite memories, or popular songs and events from the year they’re graduating. It’s a great way to personalize the party and entertain the crowd while reflecting on the graduate’s milestones.
Graduation Party Food & Drinks
No matter what kind of party you’re hosting, food and drinks are an essential part of the celebration. Whether you want a full meal or a snack station, having a variety of tasty options ensures that your guests leave happy and satisfied. Here’s a collection of fun and delicious food and drink ideas that can cater to different tastes and styles.
53. Graduation Cake
A custom graduation cake makes a natural focal point for the party. Decorate it with the graduate’s name, class year, or school colors, or opt for subtle graduation details like caps or diploma designs. It’s both a statement piece and a sweet way to mark the milestone.
54. Buffet Style
A buffet allows guests to serve themselves and choose what they like, making it ideal for larger gatherings. Mix familiar favorites with a few elevated options — think barbecue, pasta dishes, or seasonal sides — to keep the spread flexible and crowd-friendly.
55. Snack Bar
Snack bars are perfect for open-house style parties where guests come and go. Stock it with a mix of sweet and savory options like candy, chips, popcorn, or trail mix, and use clear containers or labeled jars to make it feel organized and festive.
56. Mocktail Station
A DIY mocktail station adds an interactive element to the party and works for guests of all ages. Set out juices, sparkling water, sodas, fresh fruit, and herbs so guests can create their own signature drinks — bonus points for a custom sign naming the graduate’s favorite combo.
57. Custom Cookies
Personalized cookies shaped like graduation caps, diplomas, or featuring the graduate’s initials make a fun and memorable dessert. Package a few in small bags so they double as edible party favors guests can take home.
58. Food Trucks
Hiring a food truck brings a relaxed, modern feel to your celebration and keeps things simple for the host. Whether it’s tacos, pizza, or ice cream, food trucks offer variety and a built-in experience that guests will remember.
Graduation Party FAQ
Planning a graduation party involves juggling many details, and it’s natural to have questions along the way. From figuring out when to start planning to deciding whether to include activities or special decorations, there are a lot of decisions to be made. Here we’ll answer common questions to help make your planning process smoother and stress-free.
When Should I Start Planning My Graduation Party?
It’s a good idea to start planning your graduation party at least two to three months in advance. This gives you plenty of time to book a venue (if needed), send out invitations, and organize all the details like food, decor, and entertainment. It also ensures your party doesn’t conflict with other graduation celebrations or events.
How Do I Cater to Dietary Restrictions for Guests?
When planning your menu, it’s important to be mindful of any dietary restrictions your guests may have. Consider offering a variety of options such as gluten-free, vegan, or vegetarian dishes to accommodate different needs. You can also include a note on the invitation asking guests to inform you of any dietary requirements ahead of time.
Should I Plan Graduation Party Activities?
Yes! Graduation party activities can help keep the event lively and ensure everyone has a great time. Consider options like a photo booth, lawn games, a slideshow presentation, or even a karaoke station. Activities not only entertain your guests but also create lasting memories for the graduate and their friends.
What Else Can I Do to Celebrate Graduation?
In addition to throwing a graduation party, consider sending out personalized graduation announcements to share the big news with family and friends who may not be able to attend the event. You can also celebrate the milestone by gifting the graduate something special, like a custom photo book or personalized graduation gift from Shutterfly. These thoughtful gestures make the occasion even more memorable.
Related Resources to Graduation Party Planning
With so many exciting graduation party ideas to choose from, you’re well on your way to creating an unforgettable celebration for your graduate. Whether it’s through creative themes, fun activities, or personalized decor, your party will be a special way to honor this important milestone. Start planning now, and enjoy every moment of bringing your vision to life!
Additional Resources:
- Graduation Announcement Wording
- Graduation Instagram Captions
- Graduation Quotes
- Graduation Thank You Card Messages
- Graduation Picture Ideas
- Graduation Announcement Etiquette
- Graduation Announcements vs Invitations
- Graduation Card Wishes & Messages
- Graduation Gift Etiquette
- Graduation Gift Ideas
- Senior Quote Ideas