Surprise your friends and family this season by sending them custom holiday cards. With our easily personalized templates and step-by-step instructions, creating personalized cards is simple. With just a few clicks, you can craft unique and festive cards that your loved ones can display and enjoy throughout the season. If you’re in need of some DIY holiday card ideas, browse our collection for inspiration. Once you have a card in mind, use this guide to complete your design!
1. Choose a Festive Design Color

After you pick one of our fully customizable DIY holiday cards, you’ll have a number of personalization options. Depending on which style holiday card you select, you can choose the design color. Pick a classic Christmas color, like red or green, or pick a more modern color, like gold or black. You can even pull inspiration from your Christmas party theme to match your cards. For some styles of cards, you’ll even have the option to design a custom color palette to create a special, one-of-a-kind holiday card for your family.
As you explore different options, you can click on each color and preview a sample of your card to help you decide what you like best. For some styles of cards, you’ll even have the option to design a custom color palette to create a special, one-of-a-kind holiday card for your family. As you explore different options, you can click on each color and preview a sample of your card to help you decide what you like best.
2. Select a Format You Love

Once you’ve picked the design color for your DIY Christmas cards, another option is selecting your format. Certain styles of holiday cards are available with different formatting options, like a flat stationery card, classic folded card or an array of size choices.
With each unique format, you’ll have different personalization options, like the number of photos you can include on your card. Click on the different formatting options to learn more details about what each format includes and to view a preview of the design so that you can select the one you love most.
3. Add a Personal Touch With Your Names

Now, it’s finally time to start personalizing! Once you click the “personalize” button, you can begin making unique and one-of-a-kind Christmas cards. First, you’ll be prompted to enter your last name and a list of your family members’ names. If you’re eager to get started on uploading and arranging your photos, don’t worry! You can always skip this step and come back to it later to add your family names.
4. Select a Design Layout
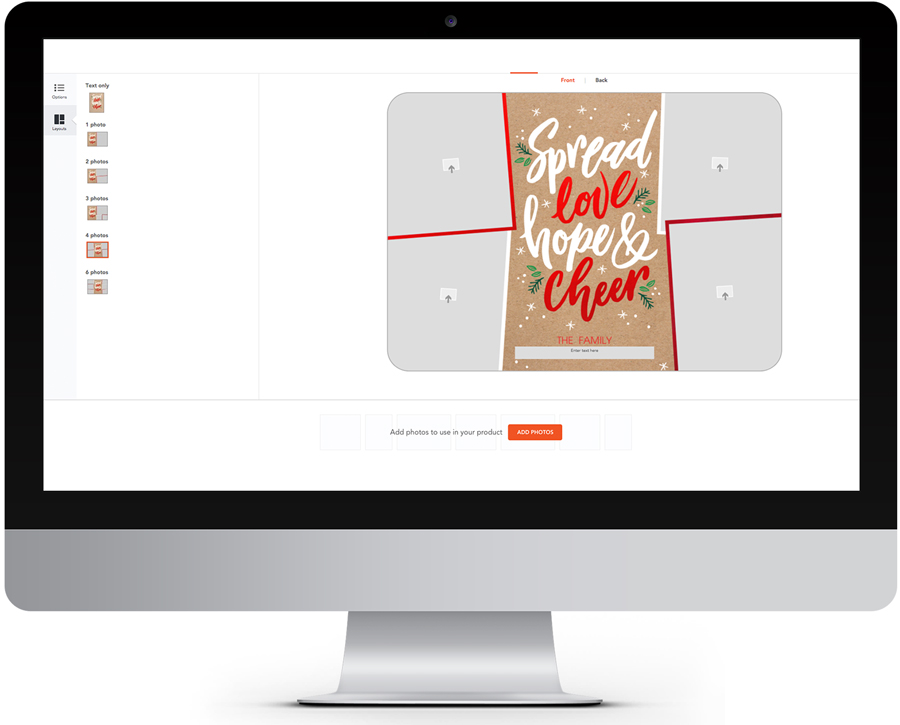
It’s the moment where you can customize your design options to make your own Christmas cards extra special. No matter which style of DIY Christmas cards you choose, you’ll have a variety of design options listed in the lefthand sidebar.
Here, you can give your cute Christmas cards a personal touch by switching up the trim to a scallop or bracket style and choosing from our signature cardstock or festive pearl shimmer. You’ll even have another opportunity to change your design color and format so that you can create DIY cards that are uniquely yours.
5. Upload Your Favorite Photos

Once you select a design you like, bring your Christmas cards come to life by adding family photos or sharing special moments from the past year. You can use your Christmas cards to share the big news, like a Christmas baby announcement design or a Christmas engagement photo. To get started, you can either click on the “add photos” button at the bottom of the page or click directly on the card in the space the image appears. You’ll have the option to upload photos from a variety of places, like your computer, Facebook, Instagram, Flickr or Google photos.
If you have a Shutterfly account, be sure to sign in so you can search through previously uploaded images, our share sites or art library. With all these great places to collect photos right at your fingertips, you’ll be able to compile a variety of family photos whether from your kids’ sports tournaments or your family trips to the beach. Customizing your DIY cards with photos from throughout the year is the perfect way to spread joy and cheer to your loved ones during the holidays.
6. Add a Personal Greeting

Give your Christmas cards an intimate touch with a personal greeting. There are an array of things you can write in your DIY cards, whether you want a more festive or nostalgic sentiment. You can keep your personal greeting short and sweet or share a special memory with your friends and family. Something simple and classic, like Season’s Greetings, never goes out of style, or you may want to write a few sentences about your family’s favorite moment from the past year.
Feel free to check out more holiday card sayings and messages if you need inspiration as to what to write in a holiday card.
7. Customize the Back of Your Card

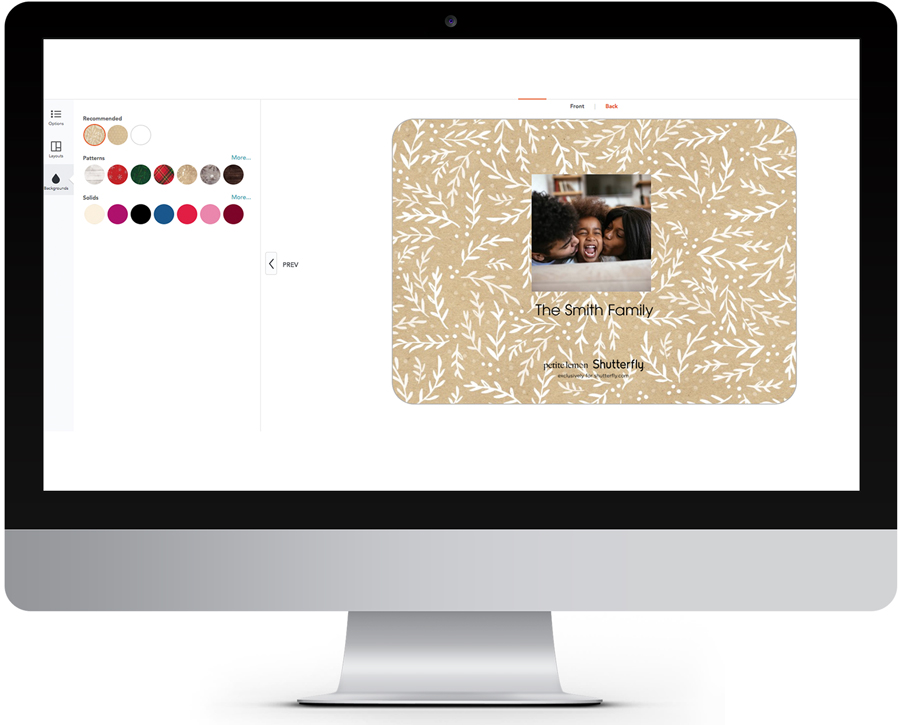
Depending on which style holiday card you select, you’ll have the option to tailor the layout and background on the backside or your DIY Christmas cards. Make your photos and personal greeting pop with a merry and bright background color or pattern. You’ll be given recommended colors and patterns that match the card you chose, or you can pick from a wide array of colors and patterns, like classic snowflakes, plaid or polka dots.
As you click through and explore your options, you can see a preview of your card and decide which color or pattern you love best.
8. Make a Statement With Your Envelope

Make your envelopes just as fun and festive as your cute Christmas cards. You can pick an envelope color that coordinates with the unique DIY cards you’ve customized, or you can add an optional slip-in liner for an unexpected pop of Christmas cheer. The color and pattern options for your envelope will be similar to those for the backside of your card. You can choose a color or pattern that matches the background you selected for your card, or you can choose something complementary.
As you click on different options, you’ll see a preview of your envelopes so you can pick the best combination.
9. Choose How to Address Envelopes

After you’ve taken the time and energy to design a uniquely personal set of DIY Christmas cards, we want to make sending them to your loved ones as easy as possible. We know that you have a never-ending to-do list to prepare for the holiday season. That’s why we offer an array of addressing preferences to take the stress and guesswork out of when to send your holiday cards.
We can address and mail your cards for you or address your envelopes, then send them to you to distribute. Plus, you always have the option to receive your DIY cards along with blank envelopes to address yourself.
10. Preview and Review

Before you finish your DIY Christmas cards and add them to your cart, take some time to preview and review your creation. Click the “preview” button in the upper righthand corner to view your fully composed holiday card from front to back. You can still play around with any options and make any changes before you finalize your project and check out. If you need any additional inspiration to make your card sparkle and shine this season, check out our compilation of holiday card ideas and themes.
11. Sign in to Save Your Project

We know you’re often multi-tasking and juggling the never-ending to-do list, particularly as the holidays start approaching. You may be creating your DIY Christmas cards in stages, whenever you find a spare moment. That’s why we’ve made it simple to save your project so you can edit and update anytime you like, without losing your work.
Simply click the “add to cart” button in the upper righthand corner, and you’ll be prompted to give your project a name and to sign in or create an account. Once you complete the required fields, you can save your project for later or place your order.
12. Add Custom Return Address Labels

Last but not least, you’ll be prompted to add custom address labels to your order. You can coordinate the design with your DIY cards or create a label you can use for your cute Christmas cards and beyond. Simply click the “edit” button in the upper righthand corner to personalize your labels with your family name and address. Whether you’re taking advantage of our addressing options or receiving blank envelopes to address and mail yourself, custom address labels are a fun and functional touch to complete your holiday cards.
Sending holiday cards to those you love most is a great way to spread joy and cheer throughout the Christmas season. This year, make your holiday card special with photos of your family and a personal greeting. After you design your one-of-a-kind DIY cards, you can check one thing off the endless holiday to-do list and start preparing for your next seasonal gathering. Browse our collection of holiday invitations, and get inspired for your annual Christmas party.


